

A non-interactive session
When to let the agent erase a machine without anyone at it, what to prepare, what the screens show, how to stop it and how to check the result.
In non-interactive mode, the agent asks nothing. After a 60-second countdown, it erases every disk it is allowed to erase, saves the proof on the stick and sends it to your organization's portal. Nobody needs to stay at the machine.
It suits machines you cannot sit in front of, or many machines at once: servers in a rack, a server started through its management card, a batch of machines to clear before they leave.
Nobody checks anything before the erasure starts. The agent does not ask you to confirm the organization, the disks or the level of guarantee. Every eligible disk is erased, external ones included. Use this mode only on a machine you have decided to erase completely, with every disk you want to keep unplugged.
Before you start
Check these points first. If one is missing, the session refuses to start, or the proof stays on the stick.
- The stick is written from your organization's ISO. See Prepare the boot medium. When you start from a CD or a virtual DVD, plug in a reports key.
- The session file gives the operator. Non-interactive mode refuses to start without a
nameor anemailunder[performer]inexawipe.conf. Fill in at least thenameand thelocation: the proof's minimal record asks for both. See Prepare a session in advance. - The number of passes is set. Hard disks get one pass of zeroes when the file says
passes = 1or gives no number, three passes for any other number. Nobody can change it during the session. - The stick has room. About 23 MB free. See When the stick is full.
- The machine has a wired network that reaches the portal. Without one, the session still runs and the proof stays on the stick, to upload later.
- The disks can be erased as connected. A disk behind a RAID volume, or password-locked, is not erased. See Disks refused at confirmation.
Start the session
Start the machine from the agent
From the USB stick, a CD, or a virtual DVD mounted through the management card.
Choose the non-interactive entry
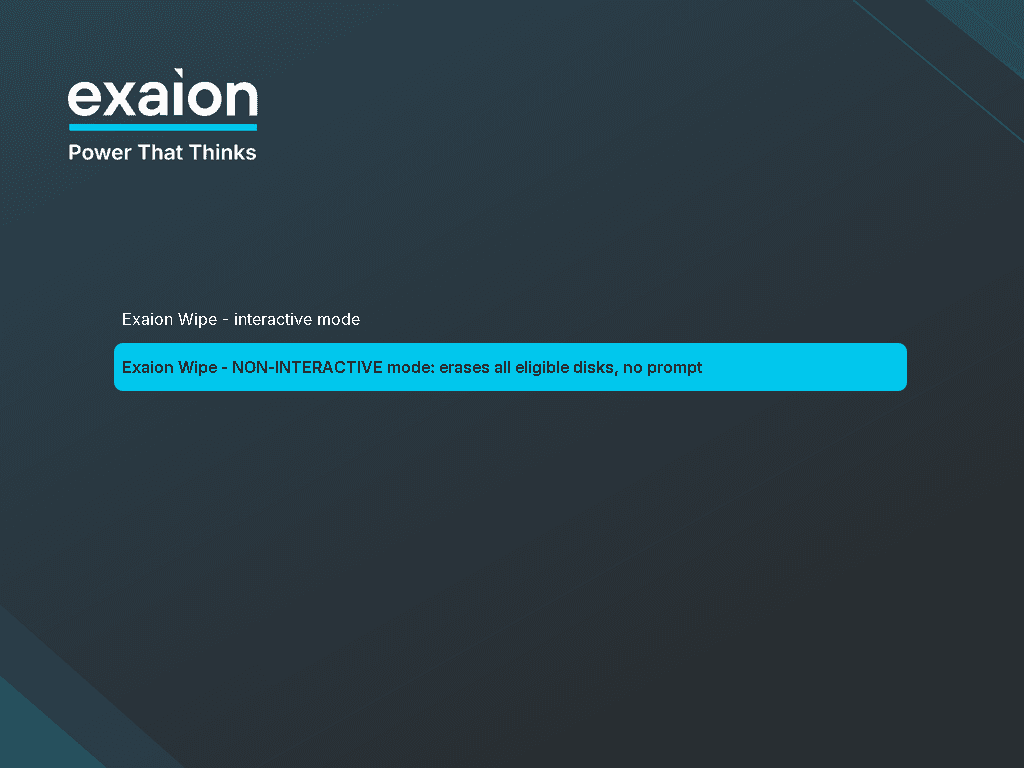
The boot menu starts the interactive mode by itself after 10 seconds. Before that, press the down arrow to highlight Exaion Wipe - NON-INTERACTIVE mode: erases all eligible disks, no prompt, then press Enter.
Leave the machine
The system starts, then the agent shows its countdown. From then on, nothing is needed until the end.
The boot menu is the only place to choose this mode. The session file cannot choose it, and the menu's entries cannot be edited. See The boot menu.
What the screen shows
The agent starts in English, and the left column says Non-interactive mode. To switch to French, open the Language list at the top of the screen with the mouse and choose Français, during the countdown or later. The countdown goes on.
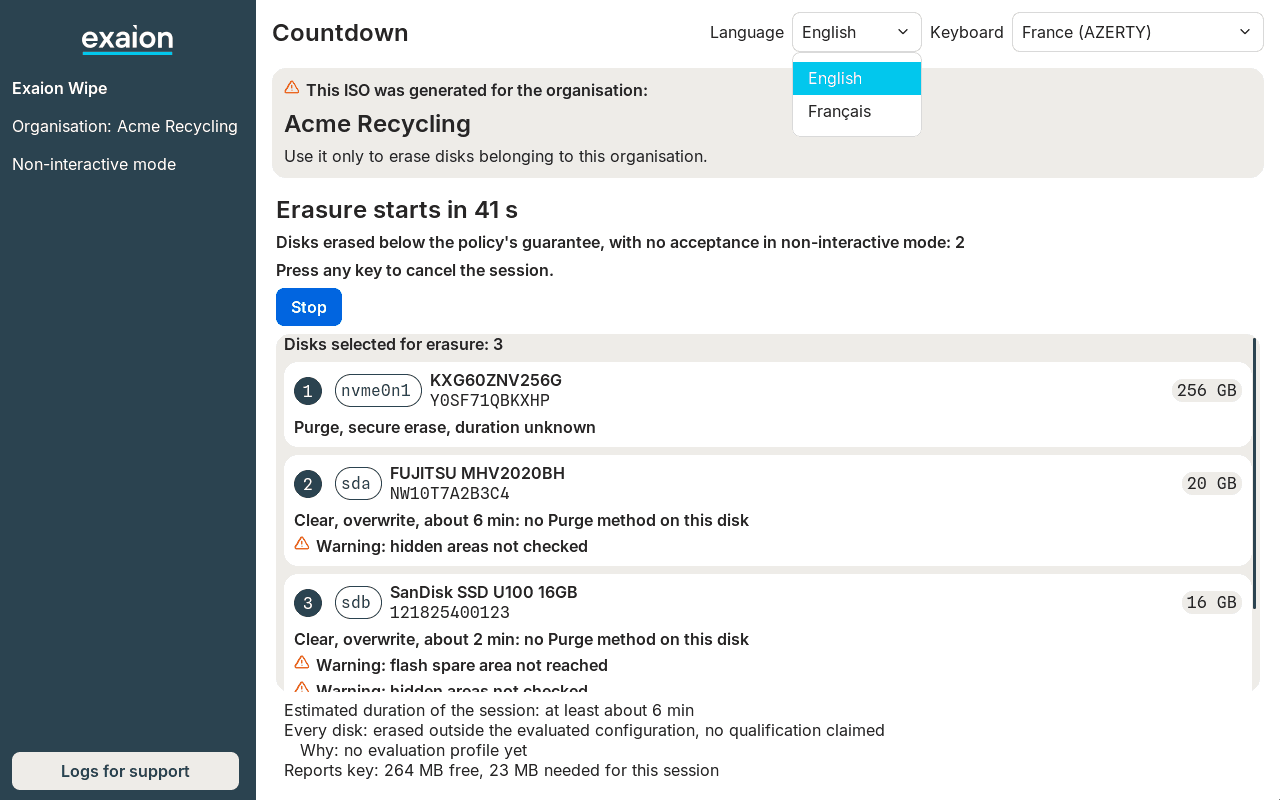
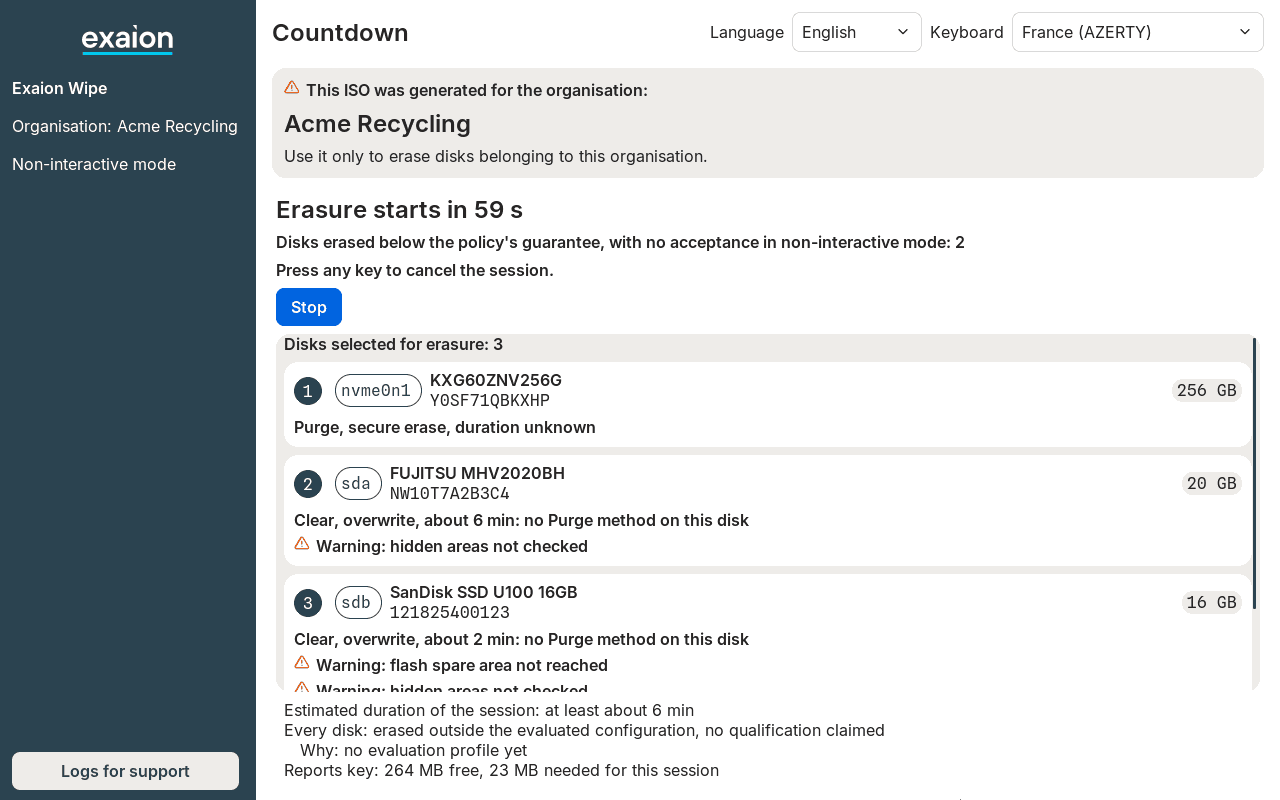
Countdown. A single screen before anything is erased. At the top, the organization the ISO
was made for. Check it if you are at the machine: the agent does not ask you to. Below are the
time left before the erasure, and how many disks will be erased below the guarantee the policy
aims for, with nobody to accept it (Disks erased below the policy's guarantee, with no acceptance in non-interactive mode: 2). Then come the disks it is going to erase, each with its level of
guarantee (Purge or Clear) and its warnings, the disks it leaves alone (Not erased:), where the
proof will go and the room on the stick.
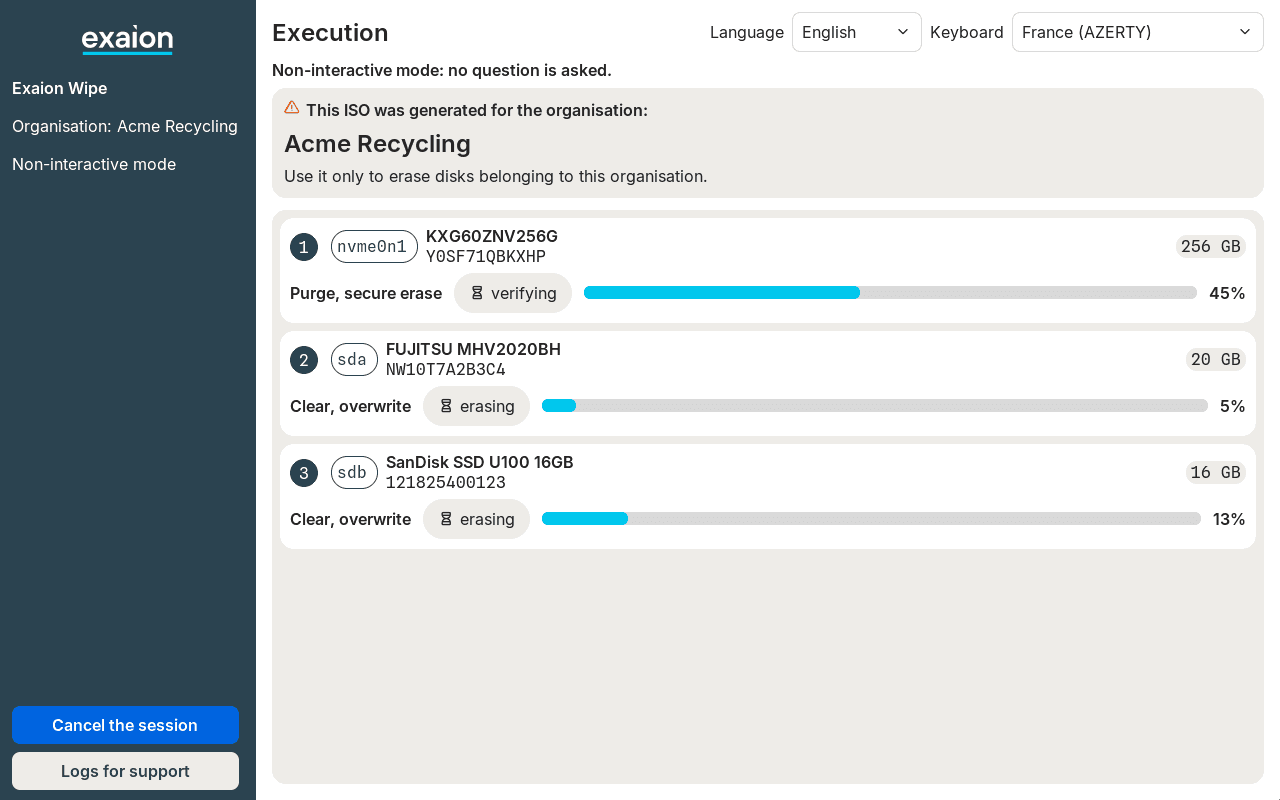
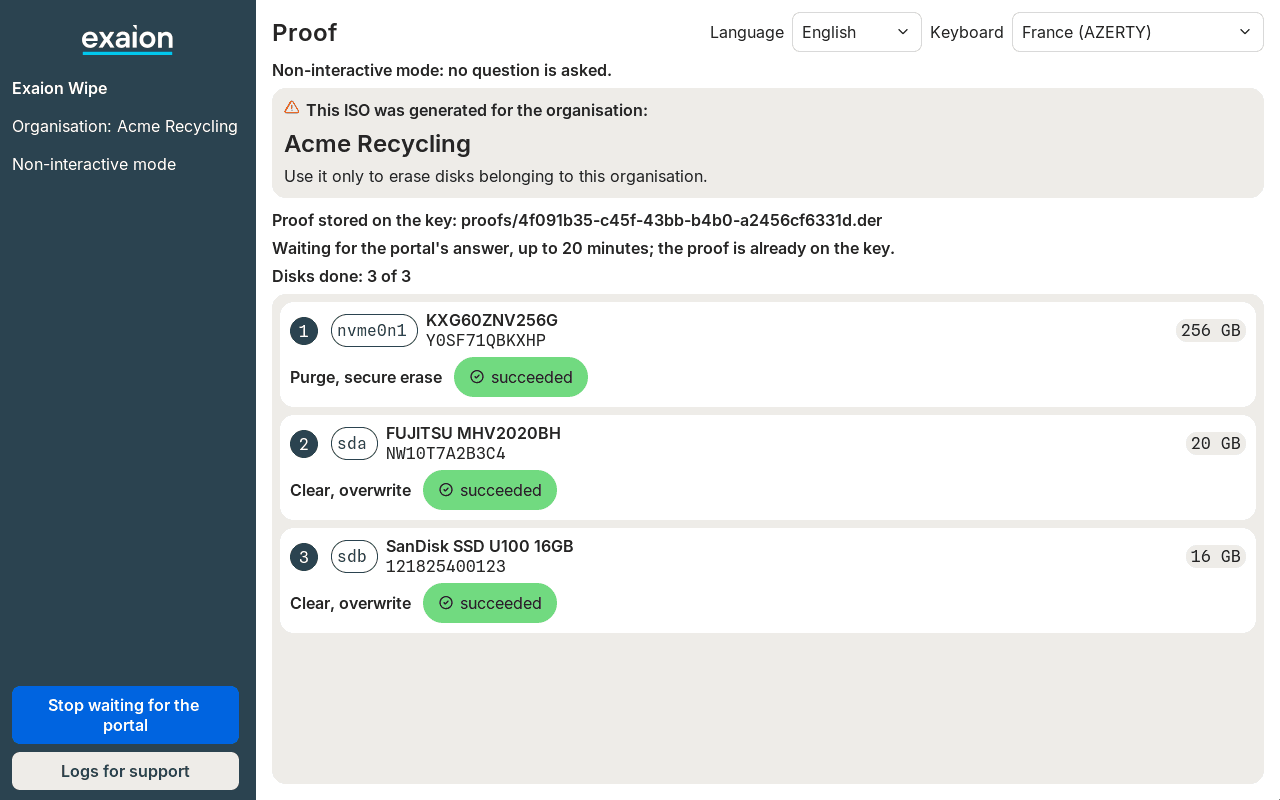
Preparation, Execution, Proof. The agent reserves room for the proof on the stick,
erases the disks in parallel, checks each one, then saves and sends the proof. Each disk goes
through erasing, verifying, then succeeded or failed.
While it waits for the portal's answer, up to 20 minutes, the screen says the proof is already on the stick and gives its path. Stop waiting for the portal ends the wait: the proof stays on the stick, to upload later.
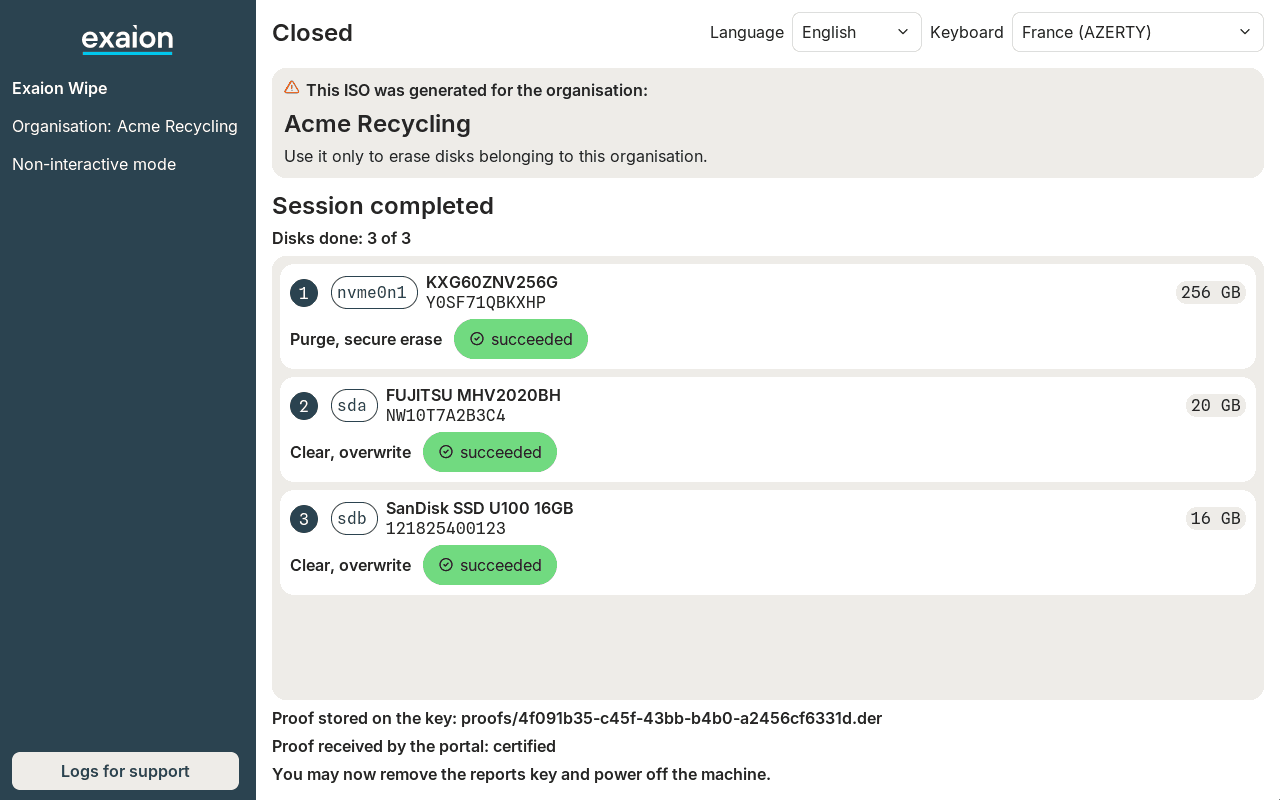
Closed. The result of each disk, where the proof is saved and what the portal answered. This
screen appears once the stick can be removed, and its last line says so:
You may now remove the reports key and power off the machine. If the logs for support are
being written, it says Do not remove the reports key yet: the logs for support are being written.
until they are. The machine stays on with this screen until you switch it off.
Language and keyboard. You can change the language of the screens, or the keyboard layout, at any time, from the Language and Keyboard lists at the top. During the countdown, use the mouse: picking from these lists does not stop the countdown, a key would. The serial consoles switch language with the screen. The proof keeps the language of the start of the countdown: English. See Language and keyboard.
What is erased
- Every eligible disk. All the disks the agent is allowed to erase are selected. The stick it started from, other Exaion media and disks it cannot identify are never erased: see Disks the agent never offers.
- Refused disks are skipped. A disk that cannot be erased safely as connected shows
Refused, will not be erased: <reason>and endsskipped. See Disks refused at confirmation. - Clear disks are erased without asking. In interactive mode, you must accept the lower guarantee for each disk that gets Clear. Non-interactive mode skips that step and erases them at Clear; the countdown says how many. In the current release, that means every disk except an NVMe SSD. The proof records that no acceptance was asked. See Two levels of guarantee.
- An SSD split into namespaces that are not all erasable is refused: see SSDs split into several namespaces.
- The record is minimal: the operator's details from the session file, without the asset traceability a full NIST SP 800-88 record adds.
- The proof is always saved on the stick first. It is sent to the portal if the portal was
reached when the session started. Otherwise it stays on the stick: the countdown screen then
says
Proof: on the key only, as the portal cannot be reached, <step>.
Stop the session
During the countdown, press any key on the machine's keyboard or on a serial console, or
click in the countdown or on Stop. The session ends with Session cancelled. Nothing is
erased: the closing screen lists the disks with the method that was planned for each, and no
result.
Any key or click in the countdown cancels, a stray one too. On a management card's remote console, keep your hands off the keyboard and mouse during the countdown.
Once the erasure has started, click Cancel the session, then confirm. On a serial
console, type any text and press Enter. The agent shows
Cancelled: no new disk starts. Wait for the proof; do not power off.:
- a disk being overwritten stops and ends
failed; - a disk under a firmware erase finishes it, as this cannot be stopped safely;
- disks not started yet end
skipped; - the proof is still saved, and the session ends with
Session cancelled.
Once the proof phase has begun, cancelling is refused until the proof is saved. After that, a line typed on a serial console stops the wait for the portal, like Stop waiting for the portal.
Do not switch the machine off to stop it: the disks would be left partly erased, with no proof.
When the session refuses to start
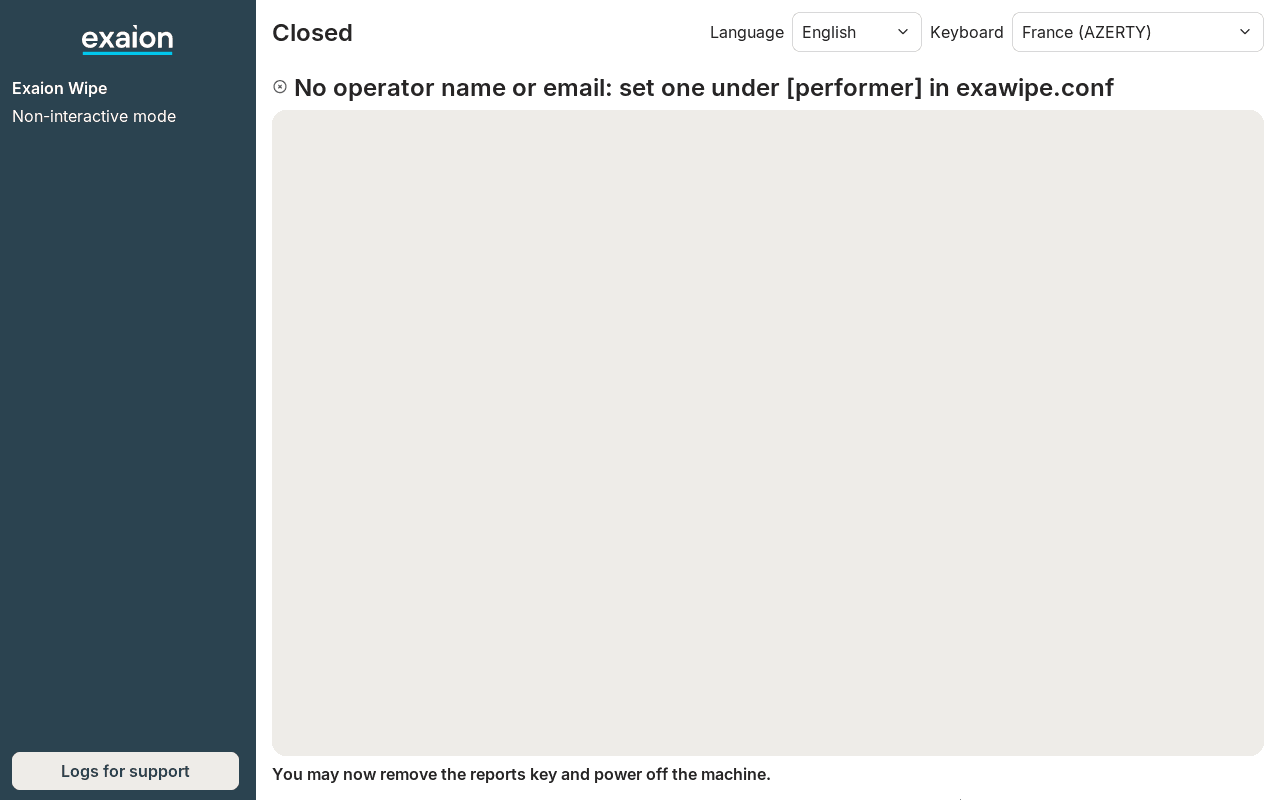
The agent checks everything it needs before the countdown. If something is missing, it shows Closed and one line in red, and erases nothing.
| Message | What to do |
|---|---|
No operator name or email: set one under [performer] in exawipe.conf | Fill in the session file on a computer: see Fill in the file. |
No operator name or email in the file at the URL of exawipe.config: add one under [performer] | Add the name or email to the file the session fetched from that address. See Prepare a session in advance. |
No operator name or email: the session file at the URL of exawipe.config could not be fetched | The file could not be downloaded: check the network and the address. |
No operator name or email on the kernel command line: add exawipe.performer.name or .email | The values came from the kernel command line: add one of these two. |
Boot medium not identified, nothing erased: start again in interactive mode | The agent cannot tell which disk it started from. Start in interactive mode. |
No disk could be selected, nothing erased: start in interactive mode to see why | No disk can be erased. Start in interactive mode to see the reasons. |
No identity on the boot medium..., No reports partition... and other messages | See The session refuses to start. |
Reports key too full, nothing erased: free space on it or plug in another key comes later, after the countdown,
still before any disk is erased. See When the stick is full.
Switch the machine off, fix the cause, and start the session again.
Check the result
Read the closing screen
Each disk shows succeeded, failed or skipped. Above the list, Session completed when the
session ran to its end. Below it, the agent shows where the proof is saved and what the portal
answered. What each line means: see Read the result.
Check the proofs on the stick
On a computer, open proofs/index.txt on the stick's WipeReports drive. A proof whose line ends
in stored has not reached the portal: upload it.
Watch from a management card
The agent shows the same screens, as plain text, on both serial ports. Open the card's serial console before you start the server: you can pick the menu entry there, then follow the session to the end. On a machine started in legacy BIOS, the menu appears on COM2 only. Which port shows what: see Follow the session from the serial console.
The console starts in English, like the screen, with the countdown's list of disks. Once another language is chosen on the screen, it goes on in that language. A complete session on a serial console looks like this (shortened):
Exaion Wipe
Non-interactive mode
This ISO was generated for the organisation:
Acme Recycling
Use it only to erase disks belonging to this organisation.

Countdown
Disks selected for erasure: 3
 1 [x] nvme0n1 KXG60ZNV256G Y0SF71QBKXHP 256 GB
   Purge, secure erase, duration unknown
 2 [x] sda FUJITSU MHV2020BH NW10T7A2B3C4 20 GB
   Clear, overwrite, about 6 min: no Purge method on this disk
   Warning: hidden areas not checked
 3 [x] sdb SanDisk SSD U100 16GB 121825400123 16 GB
   Clear, overwrite, about 2 min: no Purge method on this disk
   Warning: flash spare area not reached
   Warning: hidden areas not checked
Estimated duration of the session: at least about 6 min
Every disk: erased outside the evaluated configuration, no qualification claimed
   Why: no evaluation profile yet
Reports key: 264 MB free, 23 MB needed for this session
Not erased:
   sdc boot medium
Proof: kept on the key, then sent to the portal
Erasure starts in 60 s
Below the policy's guarantee, unaccepted (non-interactive mode): 2
Press any key to cancel the session.
Erasure starts in 50 s
...
Erasure starts in 1 s

Preparation
Non-interactive mode: no question is asked. Type any line to cancel.

Execution
Non-interactive mode: no question is asked. Type any line to cancel.
 1 nvme0n1 waiting
 2 sda waiting
 3 sdb waiting
 3 sdb erasing 0%
 1 nvme0n1 erasing
...
 1 nvme0n1 succeeded
Disks done: 1 of 3
...

Proof
Proof stored on the key: proofs/4f091b35-c45f-43bb-b4b0-a2456cf6331d.der
Waiting for the portal, up to 20 minutes; the proof is already on the key.
Non-interactive mode: no question is asked. Type any line to cancel.

Closed
Proof stored on the key: proofs/4f091b35-c45f-43bb-b4b0-a2456cf6331d.der
Proof received by the portal: certified
 1 nvme0n1 succeeded: Purge, secure erase
 2 sda succeeded: Clear, overwrite
 3 sdb succeeded: Clear, overwrite
Disks done: 3 of 3
Session completed
You may now remove the reports key and power off the machine.
COM2 also carries the system's start-up messages; COM1 carries the agent's lines only. Save the console's output if you want a copy of the session apart from the proof.
Technical details
An interactive session, step by step
Every screen of an interactive session on the machine's screen, in order, with what to do on each one.
Prepare a session in advance
Fill in the session file once, so the agent knows who carries out the erasure and how many passes to write, without typing it at each session.