

An interactive session, step by step
Every screen of an interactive session on the machine's screen, in order, with what to do on each one.
This page follows an interactive session on the machine's own screen, from the boot menu to the closing screen. Keep it open beside the machine: each step is one screen. Nothing is erased before the 60-second countdown at the end of step 10 has run out.
To run the same session from a serial console, see Interact with the agent. To erase without questions, see A non-interactive session.
Before you start. You need a stick written from your organization's ISO. Fill in the session file beforehand to avoid typing your details at each session: see Prepare a session in advance. To send the proof at the end, plug in a wired network cable: see What happens at the end.
Click with the mouse, or use Tab and Enter. Scroll a long list with the mouse wheel, or drag it with the mouse button held. Cancel the session and Logs for support stay at the foot of the left column, and Language and Keyboard at the top right of every screen. Details: The screen.
The session
Start the interactive mode
Start the machine from the stick and keep the default entry, Exaion Wipe - interactive mode: press Enter, or wait 10 seconds. See The boot menu.
The first screen of the agent appears after a minute or two, a few minutes from a virtual DVD. Before it, the screen may show the agent's left column alone for a while: this is normal.
Check the organization
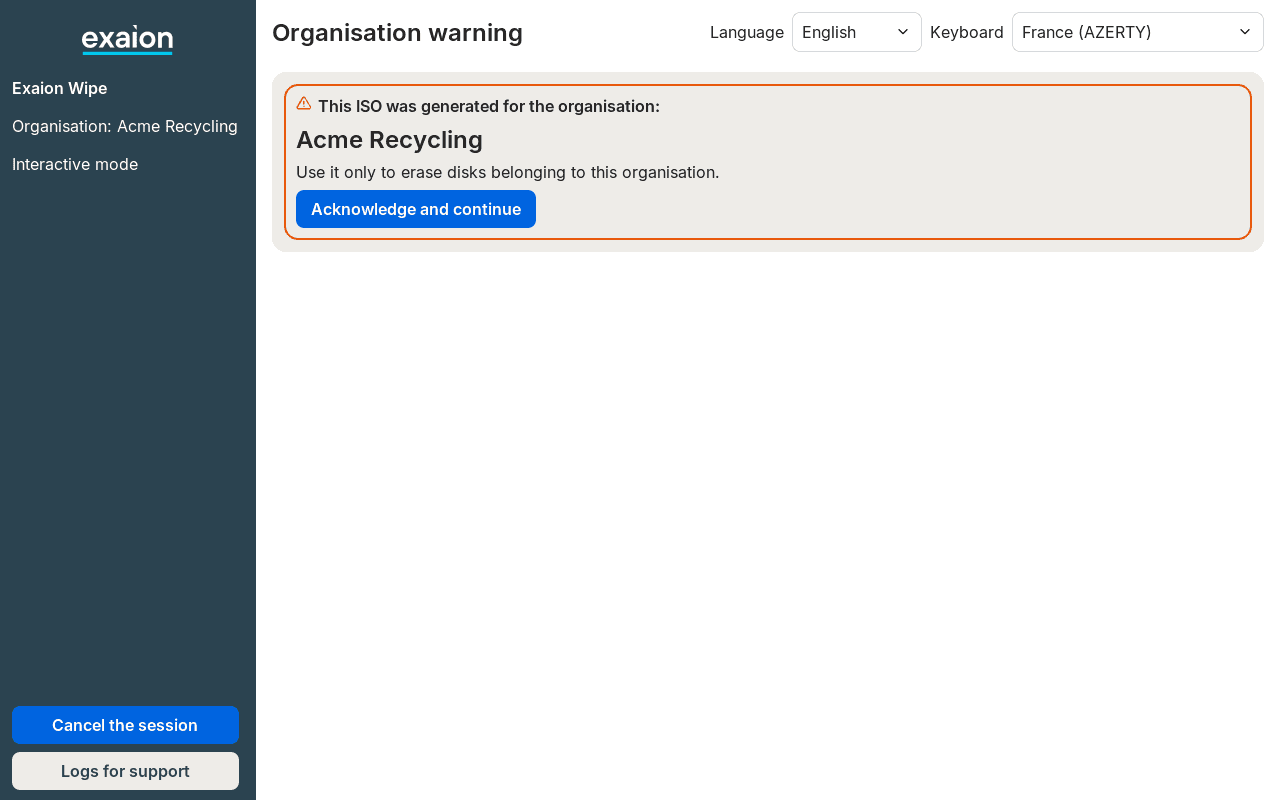
The agent shows the organization the ISO was made for. Use it only on disks that belong to that organization.
If needed, change Language (English or Français) and Keyboard (the layout you type with) at the top right: see Language and keyboard. Then click Acknowledge and continue.
Choose the record
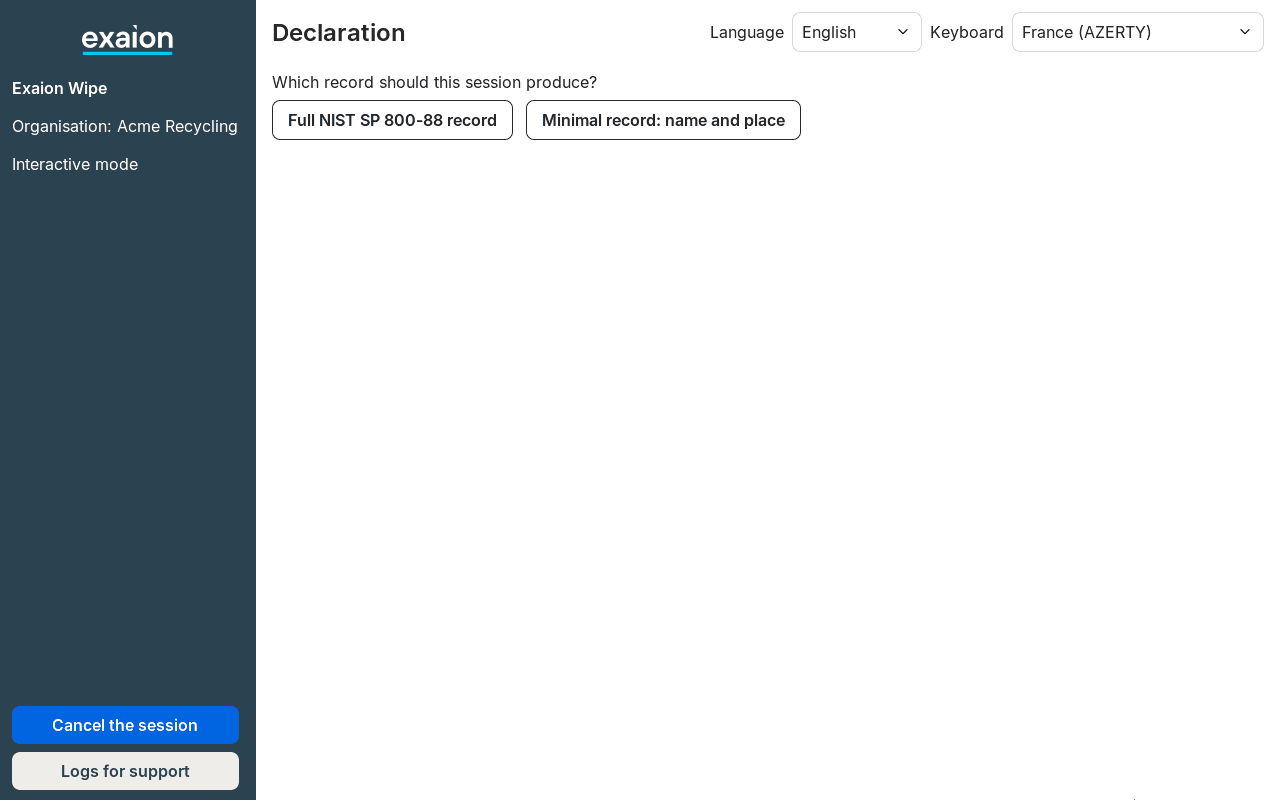
Choose how much the proof records. This never changes how the disks are erased.
| Choice | What it asks for |
|---|---|
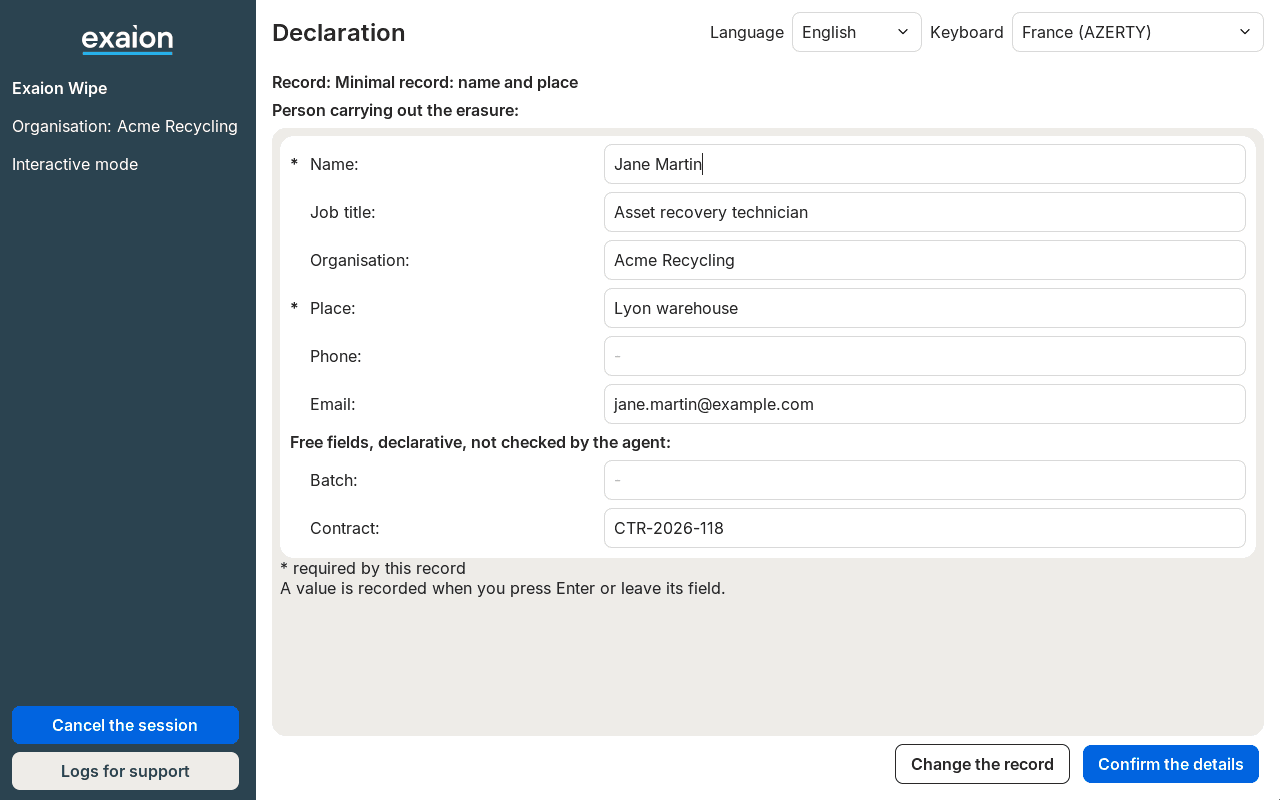
| Minimal record: name and place | The person carrying out the erasure. Name and place are marked as required. Steps 5, 7 and 8 are skipped. |
| Full NIST SP 800-88 record | The person (all six details marked as required), a description of the equipment, and your attestation: steps 5, 7 and 8. |
Check who carries out the erasure
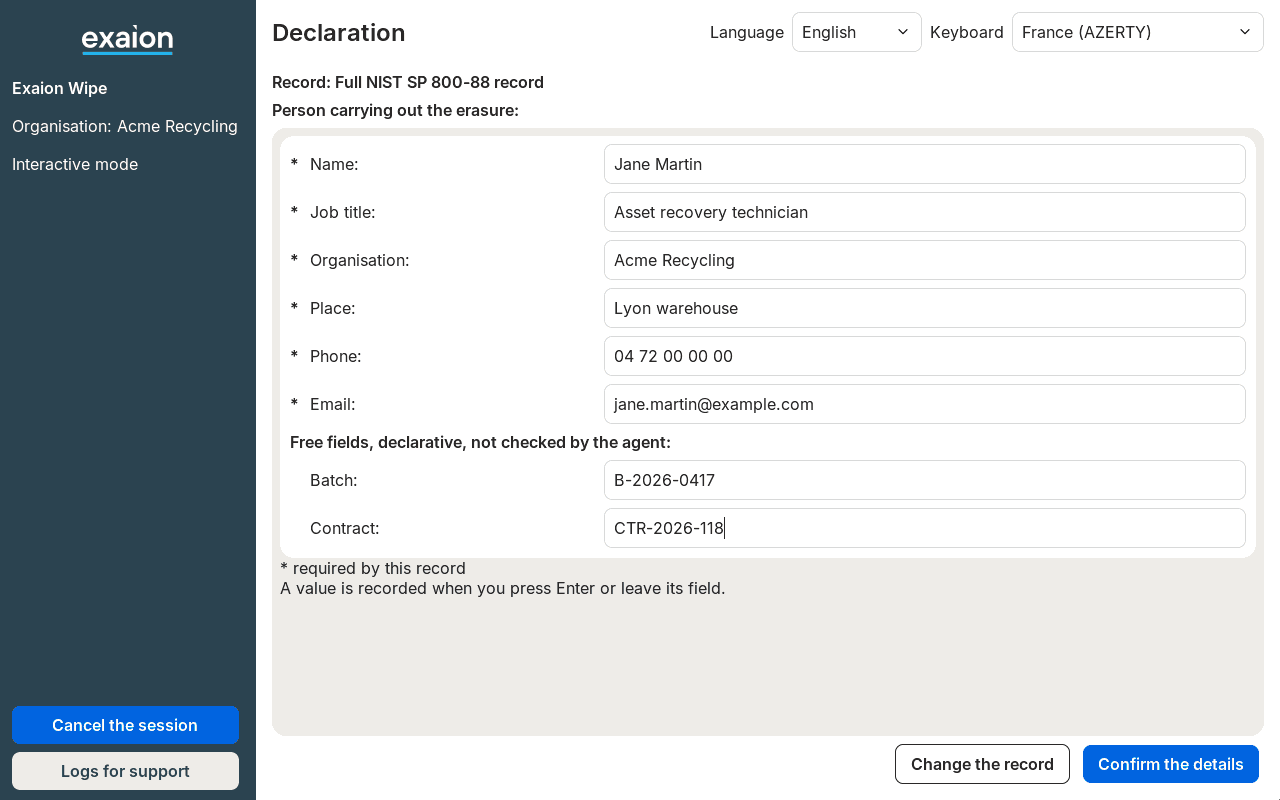
The six details (name, job title, organization, place, phone, email) are filled in from the
session file. Correct or complete them. A value is taken when you press Enter or leave its
field. A star marks the details this record asks for, but the agent only insists on a name or
an email: without either it shows Give a name or an email first.
When your organization defines free fields (a batch or contract number, for example), they
appear under the person, below Free fields, declarative, not checked by the agent:. Fill them
in the same way; the session file can prefill them too.
With the minimal record, only Name and Place carry a star:
What you type here is used for this session only; the session file is not changed. Click
Confirm the details. If the agent answers Value recorded: read it, then confirm., check
the value and click again.
Full NIST record only: describe the equipment
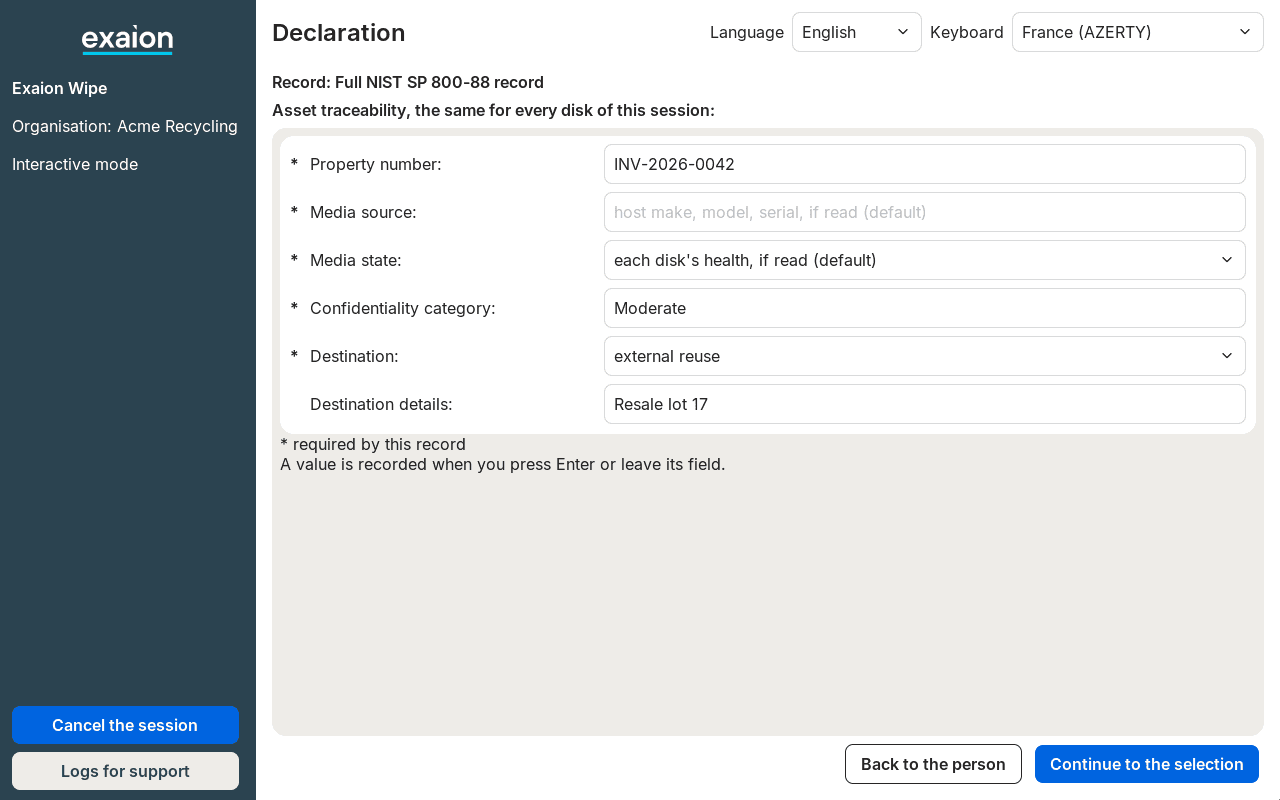
These values apply to every disk of the session. Leave a list on its default when it suits you.
| Field | What to give |
|---|---|
| Property number | Your inventory number for the machine |
| Media source | By default, the machine's make, model and serial number, as the agent reads them |
| Media state | By default, each disk's health, if read; or operational, damaged |
| Confidentiality category | Free text, your organization's category |
| Destination | internal reuse, external reuse, recycling, manufacturer return or other |
| Destination details | Optional |
The agent marks them as required but does not stop you if one is empty: the proof records it as missing. Click Continue to the selection.
Select the disks
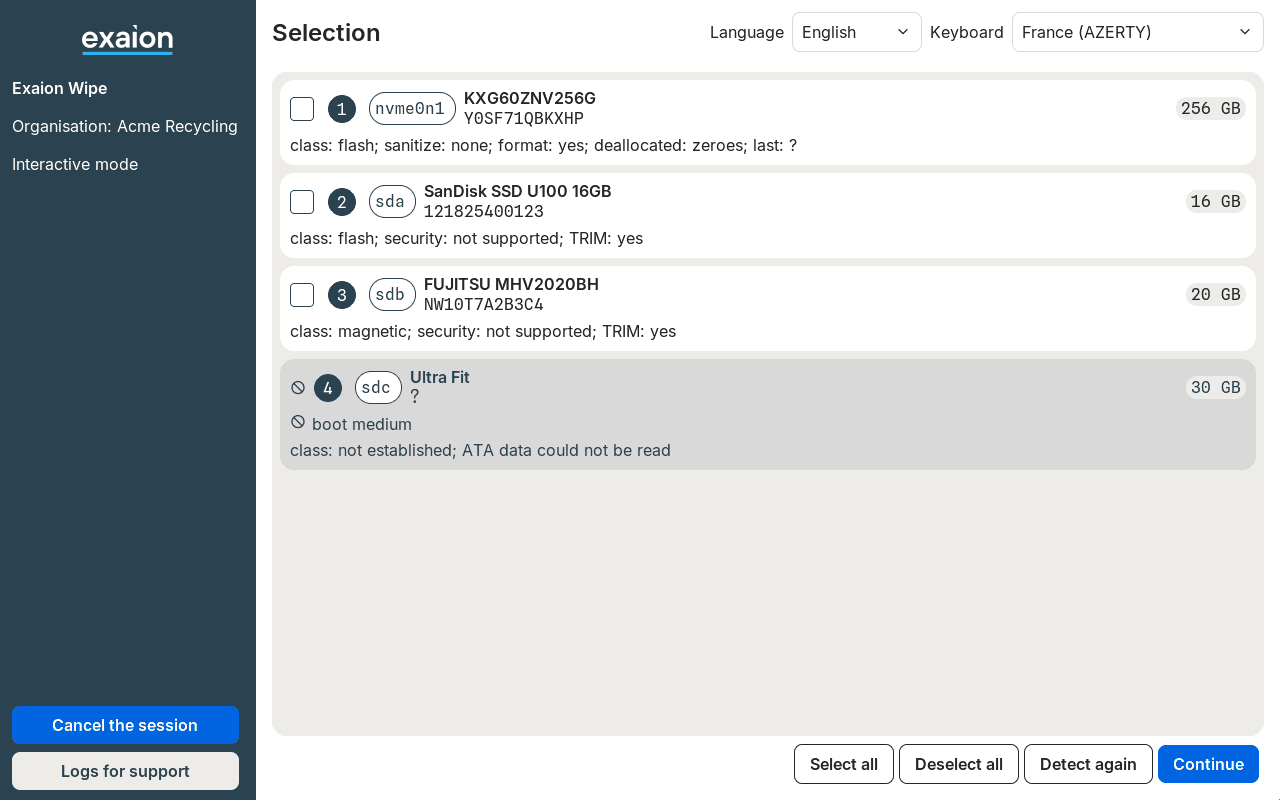
Tick the disks to erase, or click Select all. Then click Continue.
A grayed disk with no box cannot be selected; the reason is under its name, for example
boot medium (the stick the agent started from) or no stable identity (the disk gives no
serial number the proof can rely on). Clicking it shows
This disk cannot be selected: its line says why. All reasons: see
Disks the agent never offers. After plugging or replacing a disk, click
Detect again.
Each disk shows its model and serial number. Its short name (sda, sdb...) can change from one
start to the next: identify a disk by its model and serial number.
Full NIST record only: per-disk values
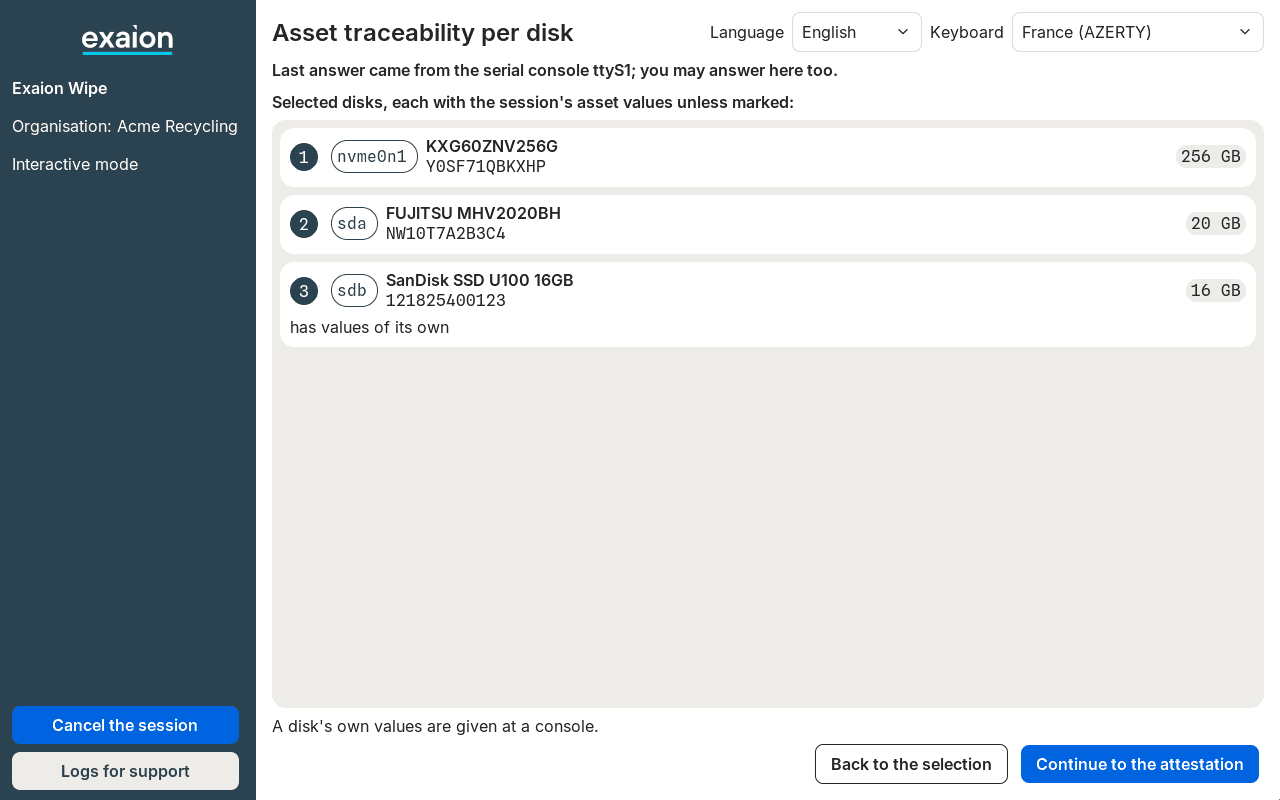
The screen lists the selected disks. Each one takes the equipment values of step 5. To give a
disk values of its own (a different property number, for example), use a serial console: the
screen cannot edit them, and shows has values of its own under such a disk. See
Only at a console. Click Continue to the attestation.
Full NIST record only: attest
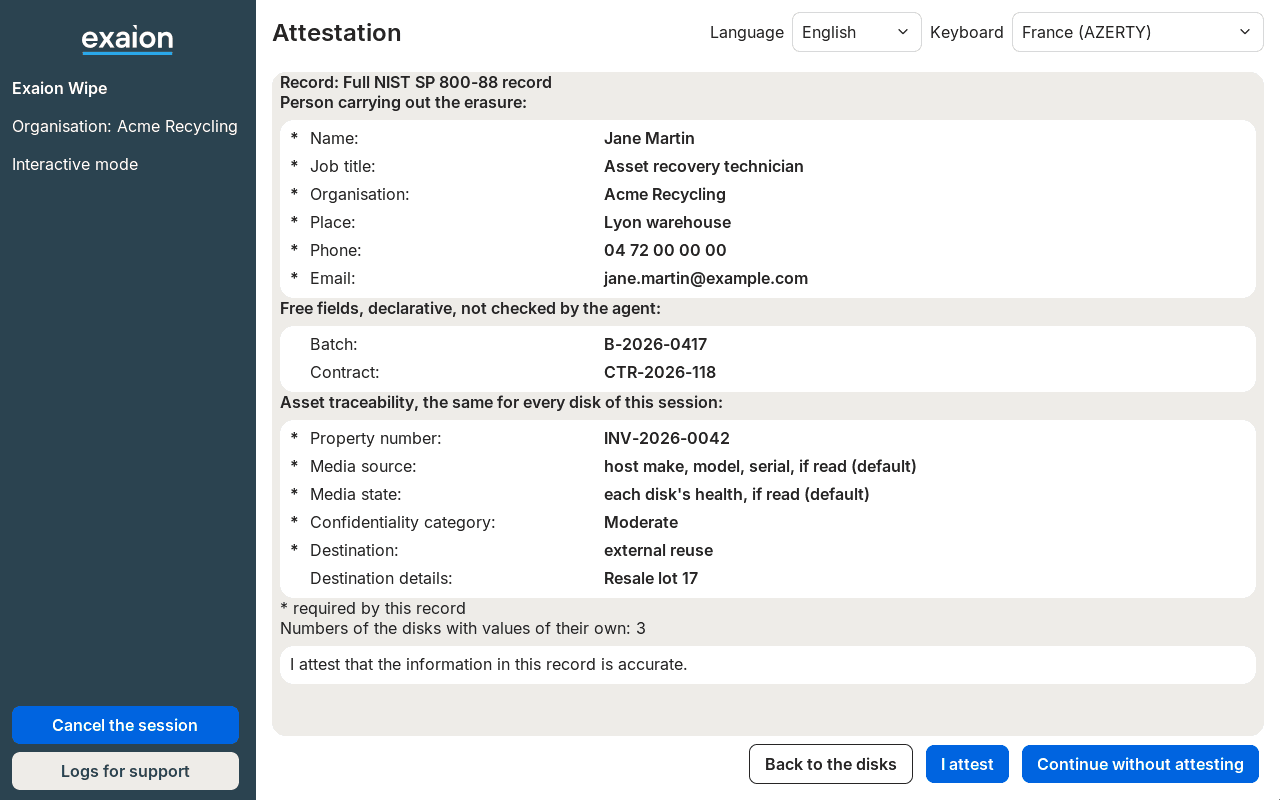
Read the summary of everything you declared, then the statement
I attest that the information in this record is accurate.
- I attest records your attestation and its time in the proof.
- Continue without attesting goes on as well: the erasure is the same, but the proof records the attestation as missing.
If you go back and change a block afterwards, attest again.
Confirm the erasure
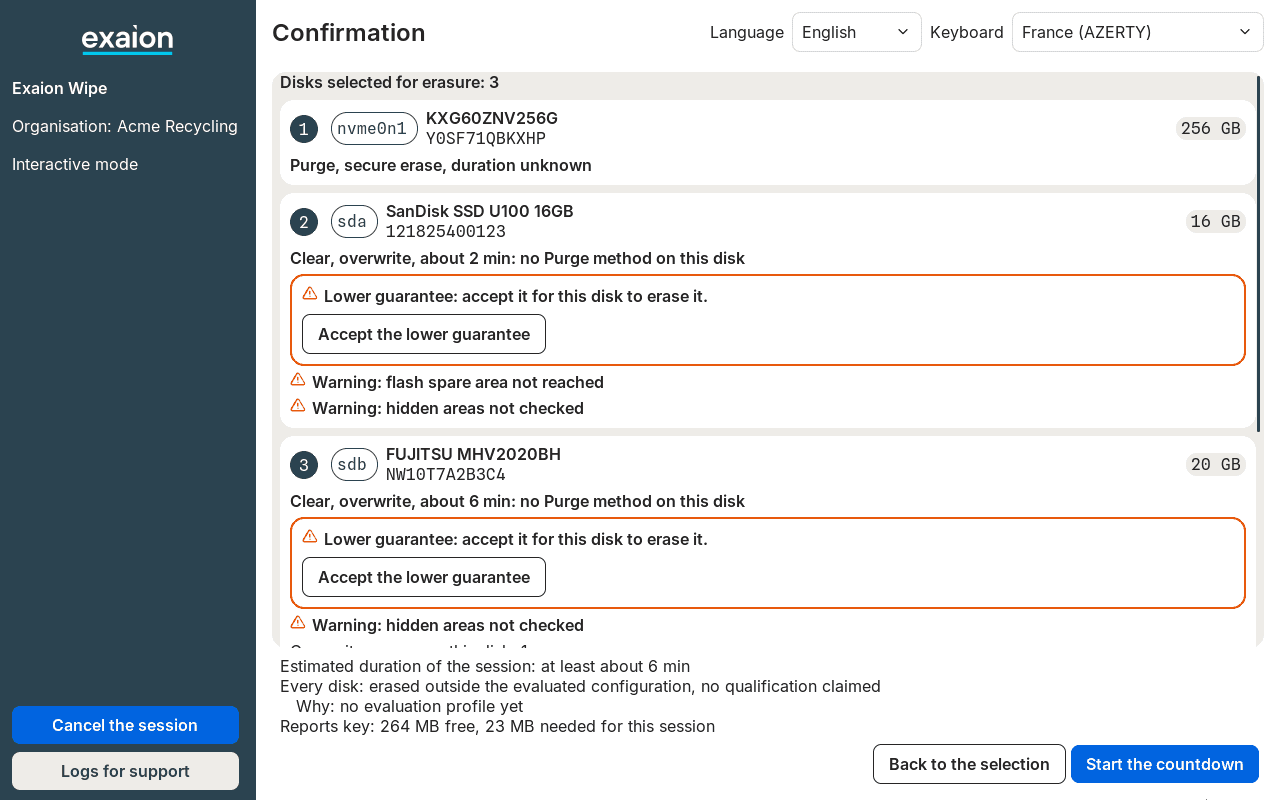
This screen says what will happen to each disk. Nothing is erased yet.
- Read each disk's line. It gives the level (Purge or Clear) and the method, for example
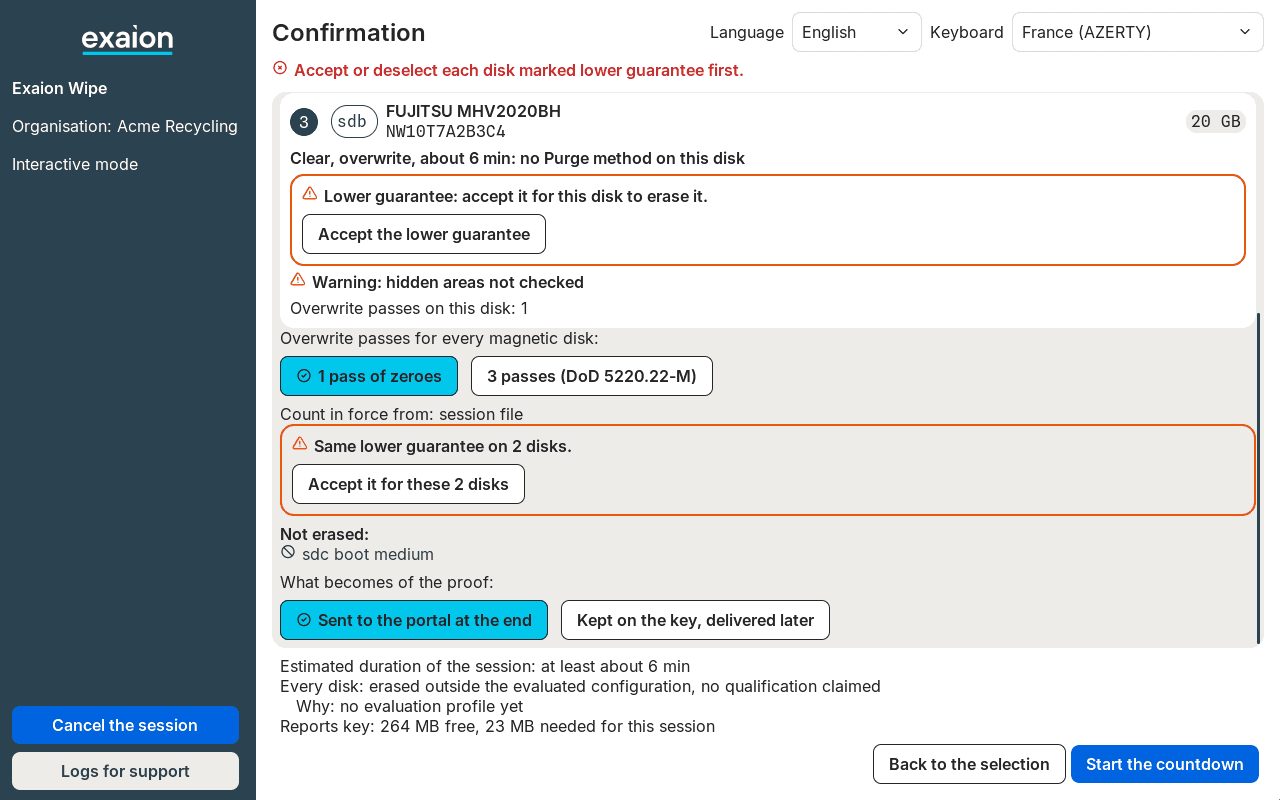
Clear, overwrite, about 6 min: no Purge method on this disk. Warnings and refused disks are explained in How disks are erased. - Accept the lower guarantee. Each disk erased at Clear asks for it: click Accept the lower guarantee under the disk, or Accept it for these N disks further down to accept them all at once. To leave a disk out instead, go back to the selection.
- Choose the passes, if a hard disk is listed: 1 pass of zeroes (the default, unless the session file says otherwise) or 3 passes (DoD 5220.22-M).
- Choose what becomes of the proof: Sent to the portal at the end, or Kept on the key, delivered later to upload it yourself.
- Check the reports key line at the bottom:
Reports key: 264 MB free, 23 MB needed for this session. If the key is short of room, see The reports key is too full before going on. - Click Start the countdown. It is refused with
Accept or deselect each disk marked lower guarantee first.until every Clear disk is accepted.
Back to the selection drops every acceptance: accept again when you come back.
Let the countdown run
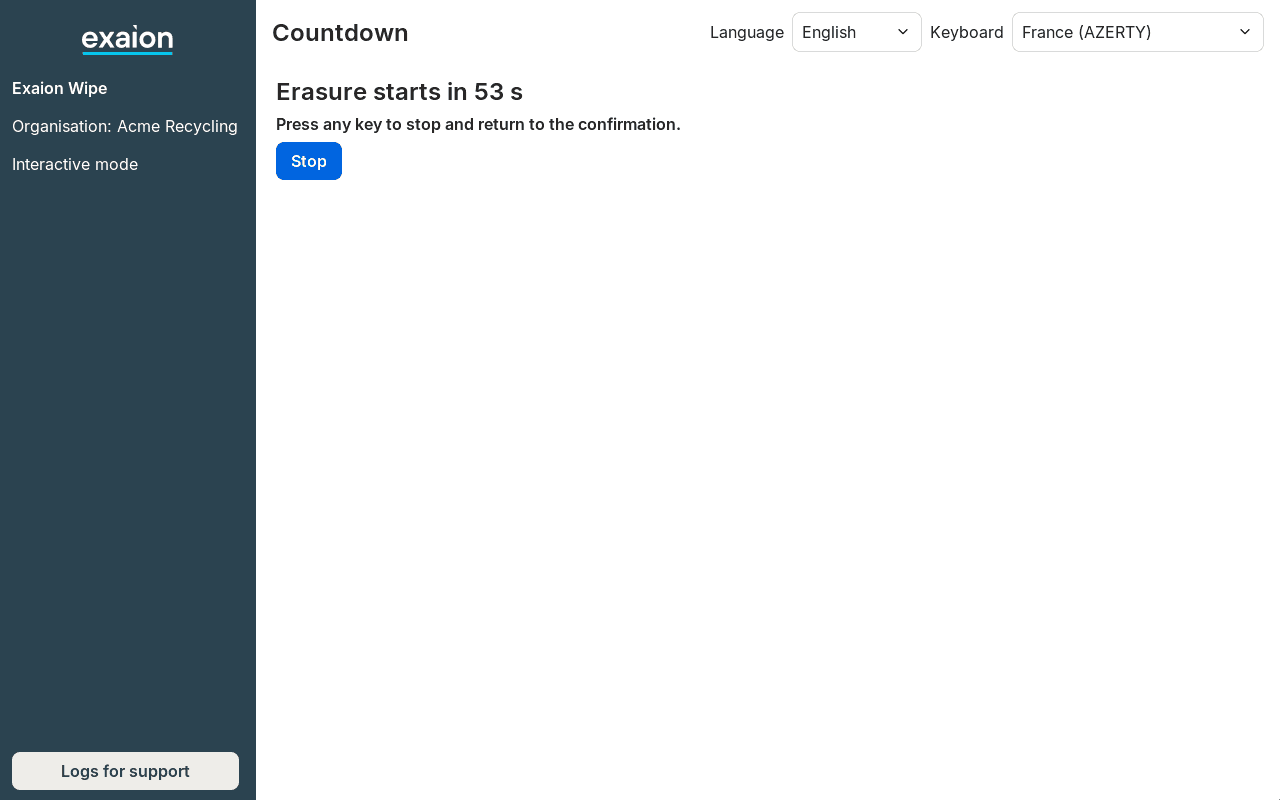
Erasure starts in 60 s. To stop it, press any key, click anywhere in the page or click
Stop: you are back on the confirmation screen with your choices kept. The Language and
Keyboard lists can still be changed with the mouse without stopping it. Once it reaches zero,
the erasure starts.
Preparation
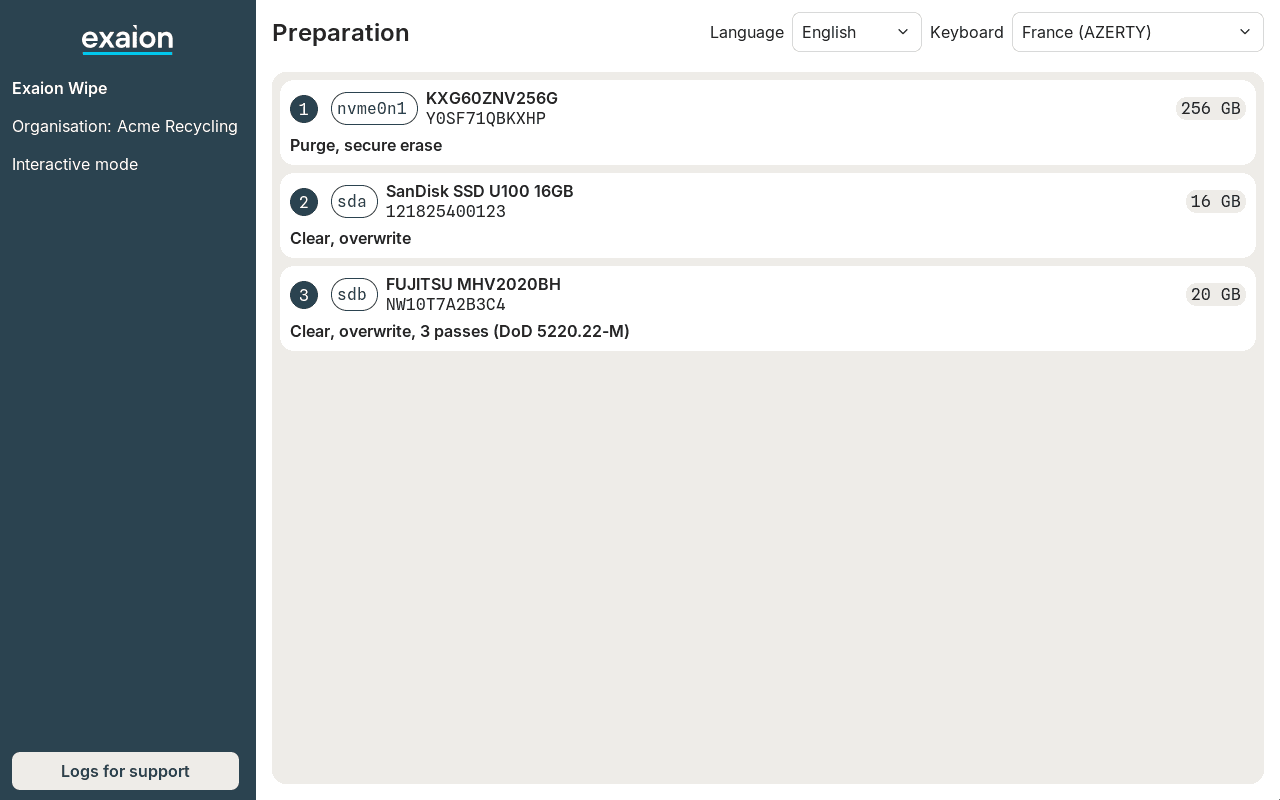
The agent writes the session's identifiers on the stick and checks there is room for the proof. It takes a few seconds and touches no disk.
Follow the erasure
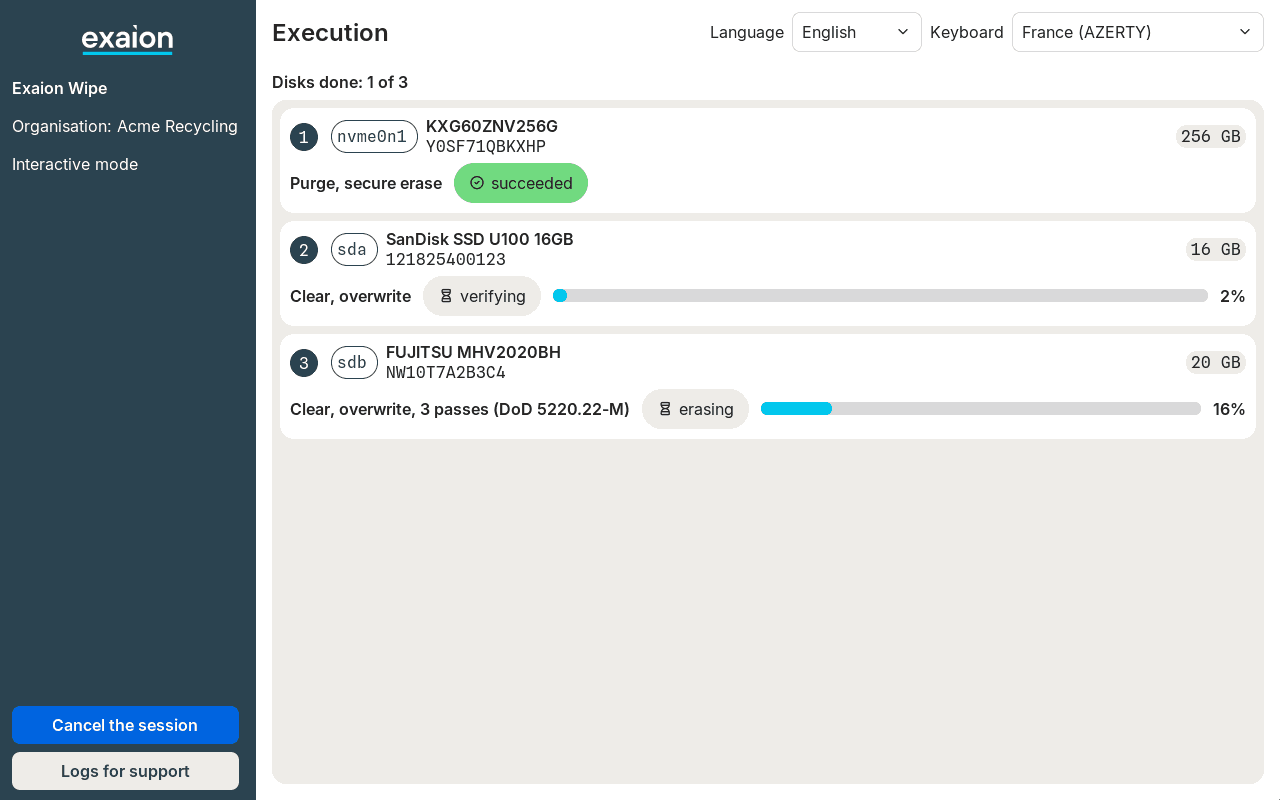
Each disk shows its state and a progress bar. The disks are erased at the same time.
| State | Meaning |
|---|---|
waiting | Not started yet |
erasing | Being erased; with three passes, the bar goes through each pass |
verifying | The agent reads the disk back to check the result |
succeeded | Erased and checked |
failed | The erasure or its check did not pass, or it was stopped by a cancel: see How the result is checked |
skipped | Not erased: removed, changed, refused, or the session was cancelled |
A failed disk does not stop the others. How long it takes depends on the disks: an overwrite writes every block, then reads every block back.
Wait for the proof
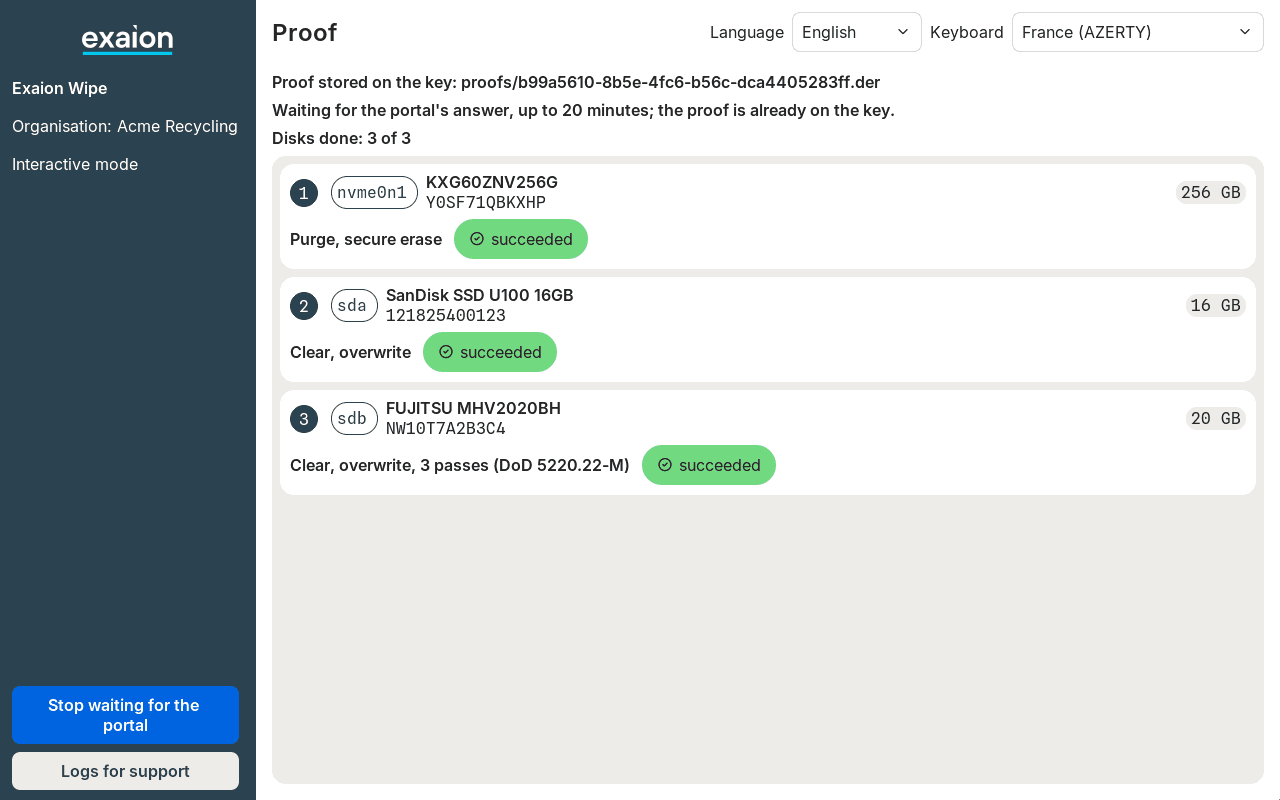
The screen title becomes Proof. The agent seals the proof, saves it on the stick, then sends
it to the portal and waits for its answer. This usually takes a few seconds. The screen says
Proof stored on the key: proofs/<session>.der, then
Waiting for the portal's answer, up to 20 minutes; the proof is already on the key.
Do not switch the machine off. If you cannot wait, click Stop waiting for the portal: see The portal stops answering.
Read the closing screen
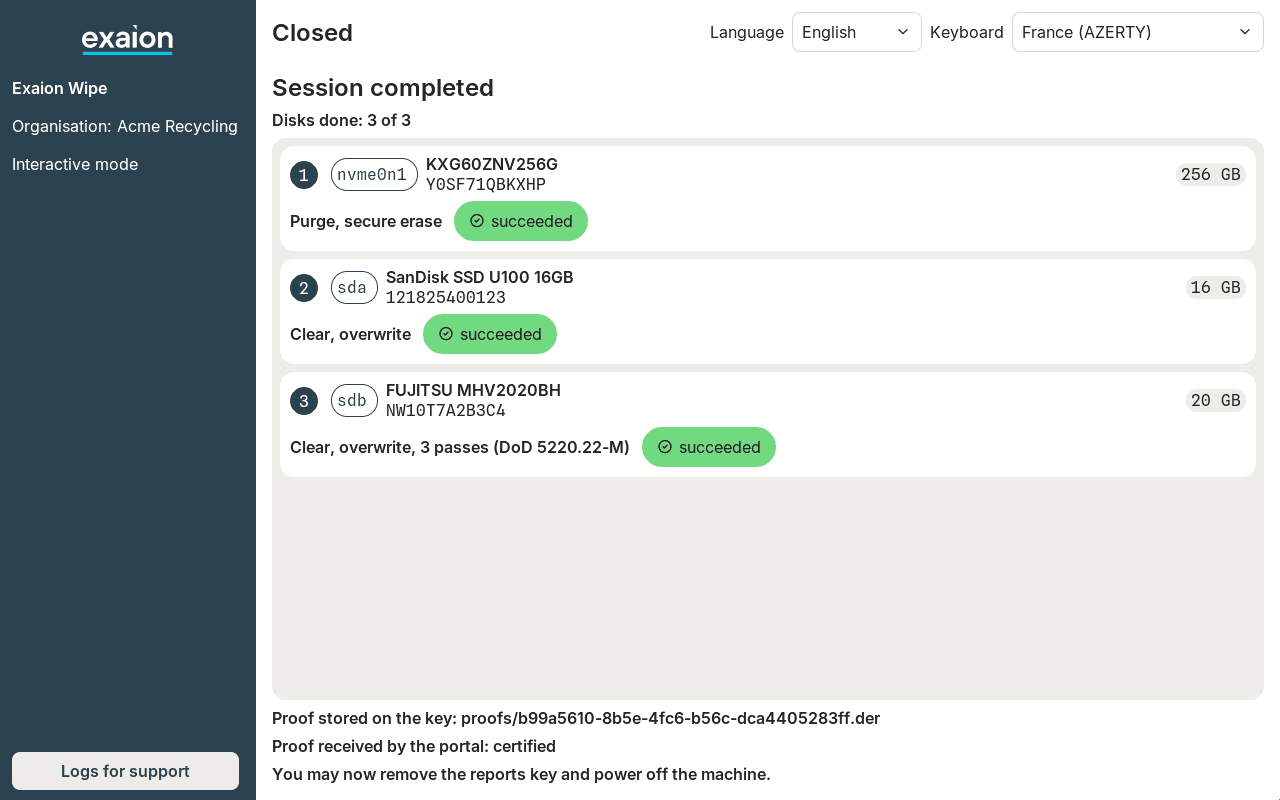
The title becomes Closed, with Session completed, the result of each disk and three lines
at the bottom:
Proof stored on the key: proofs/<session>.der: the proof is on the stick.Proof received by the portal: certified: the portal has it.You may now remove the reports key and power off the machine.
Other lines and what to do: see Read the result. The agent never switches the machine off: do it yourself, then take the stick. See Switch off and remove the stick.
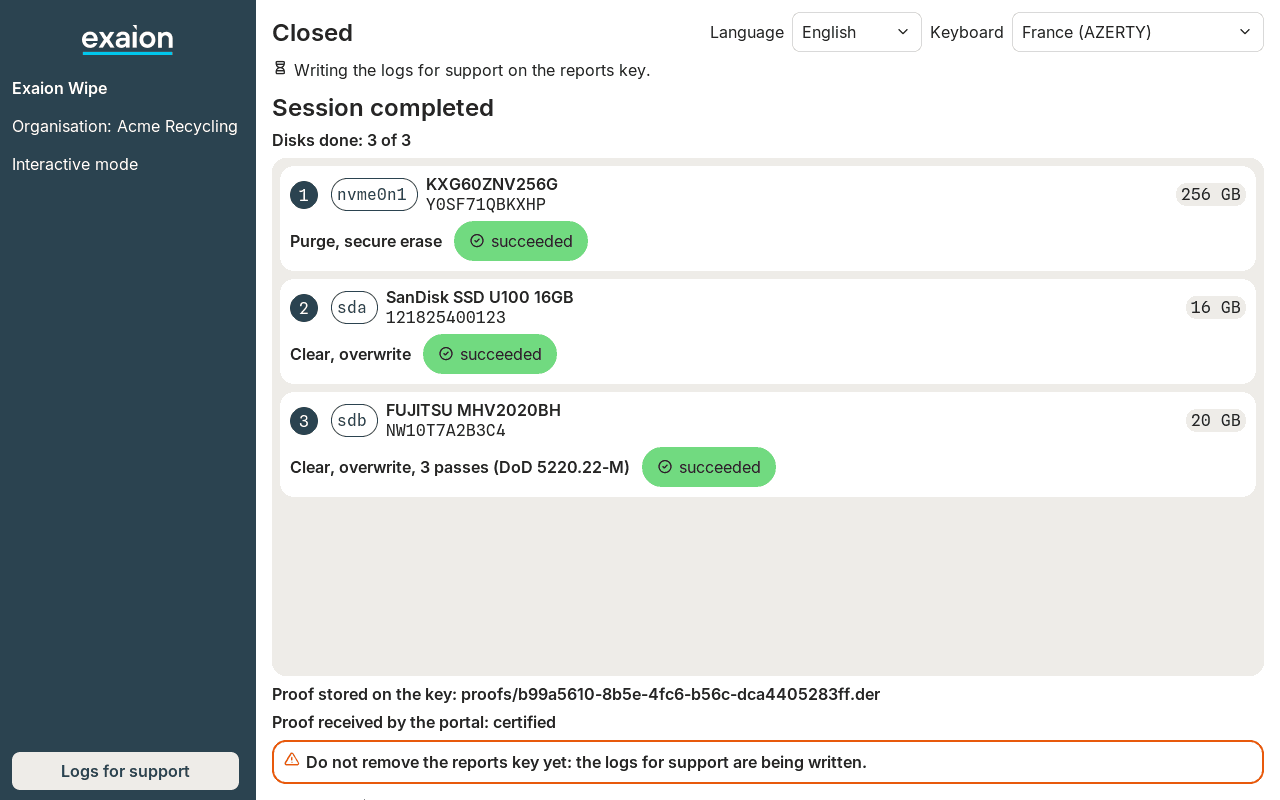
Logs for support still works here. While the file is written, the last line becomes
Do not remove the reports key yet: the logs for support are being written. Wait until
You may now remove the reports key and power off the machine. comes back.
What can go differently
The portal cannot be reached
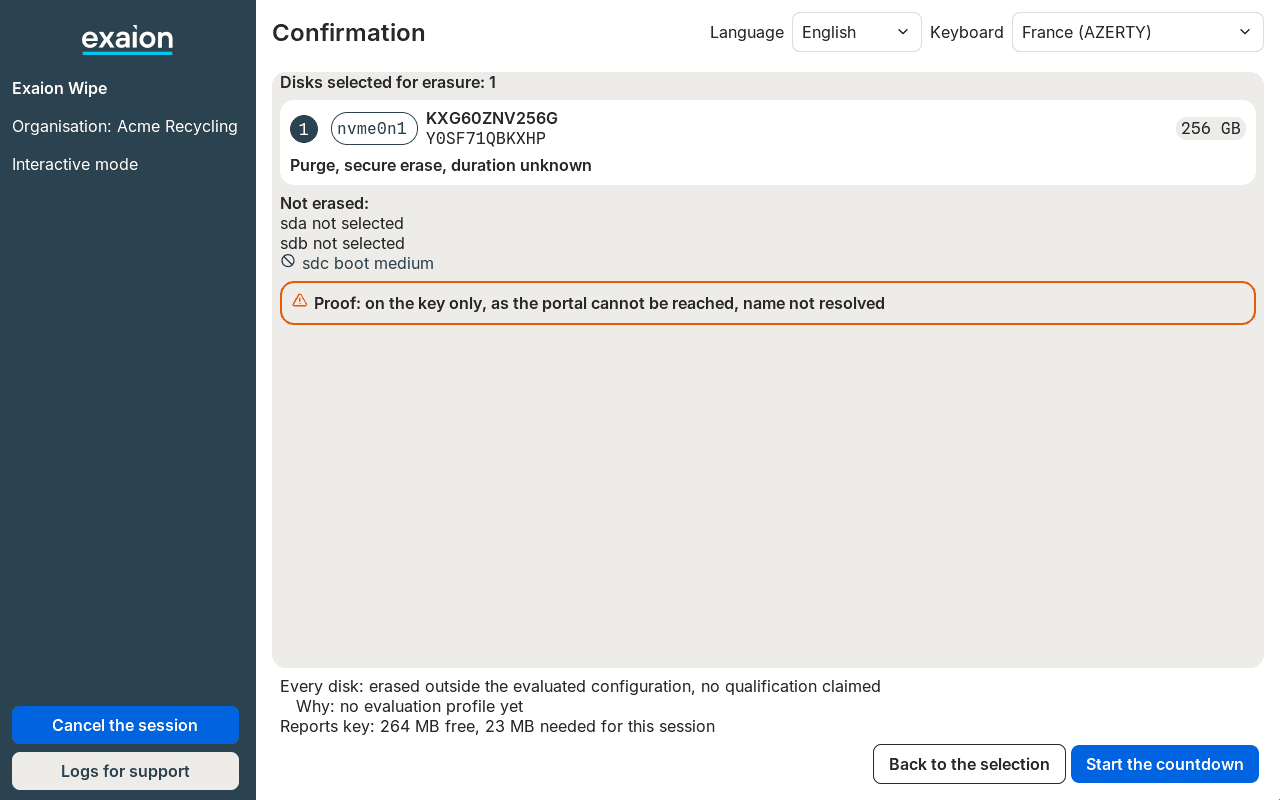
The confirmation screen offers no choice for the proof and shows
Proof: on the key only, as the portal cannot be reached, <reason>. The session runs as usual.
The closing screen says Proof kept on the key, to deliver to the portal later:
upload it from another computer.
The portal refuses the proof
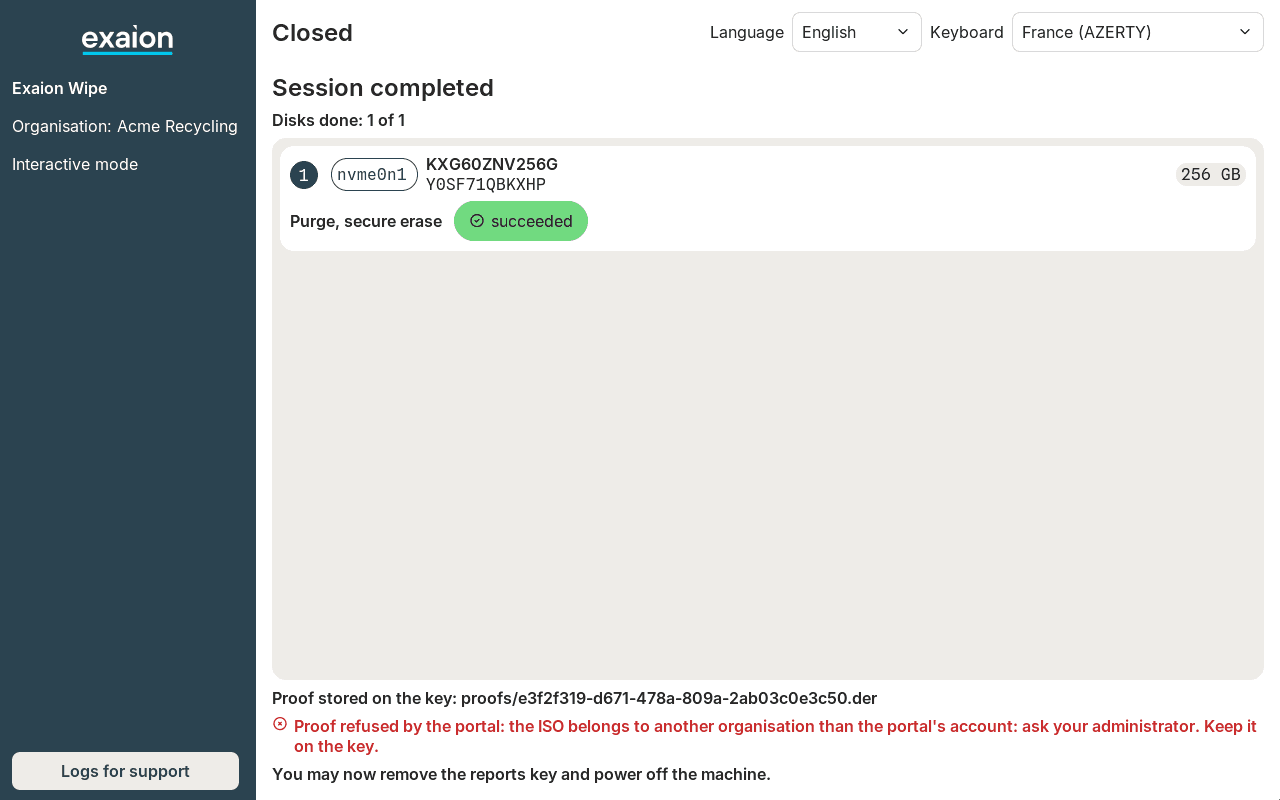
The closing screen says Proof refused by the portal: <reason>. Keep it on the key. The reason
says what to do, for example ask your administrator. Keep the stick as it is: see
Read the result and Troubleshooting.
The portal stops answering
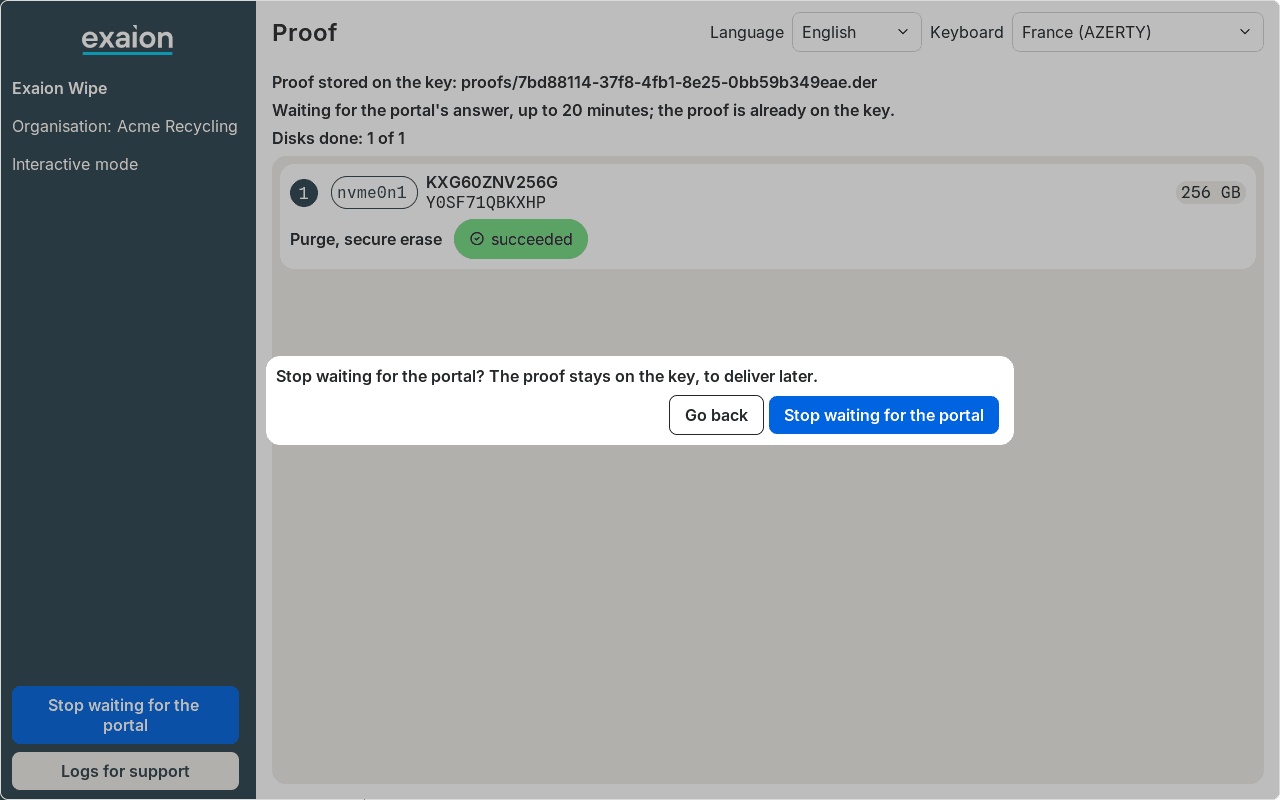
The Proof screen keeps waiting, for 20 minutes at most. To stop sooner, click
Stop waiting for the portal, then confirm. The proof stays on the stick: the closing screen
says Proof not delivered: kept on the key for a later delivery.
Upload it later. At a serial console, type q.
If you let it wait and the portal still does not answer, the closing screen says the same.
The reports key is too full
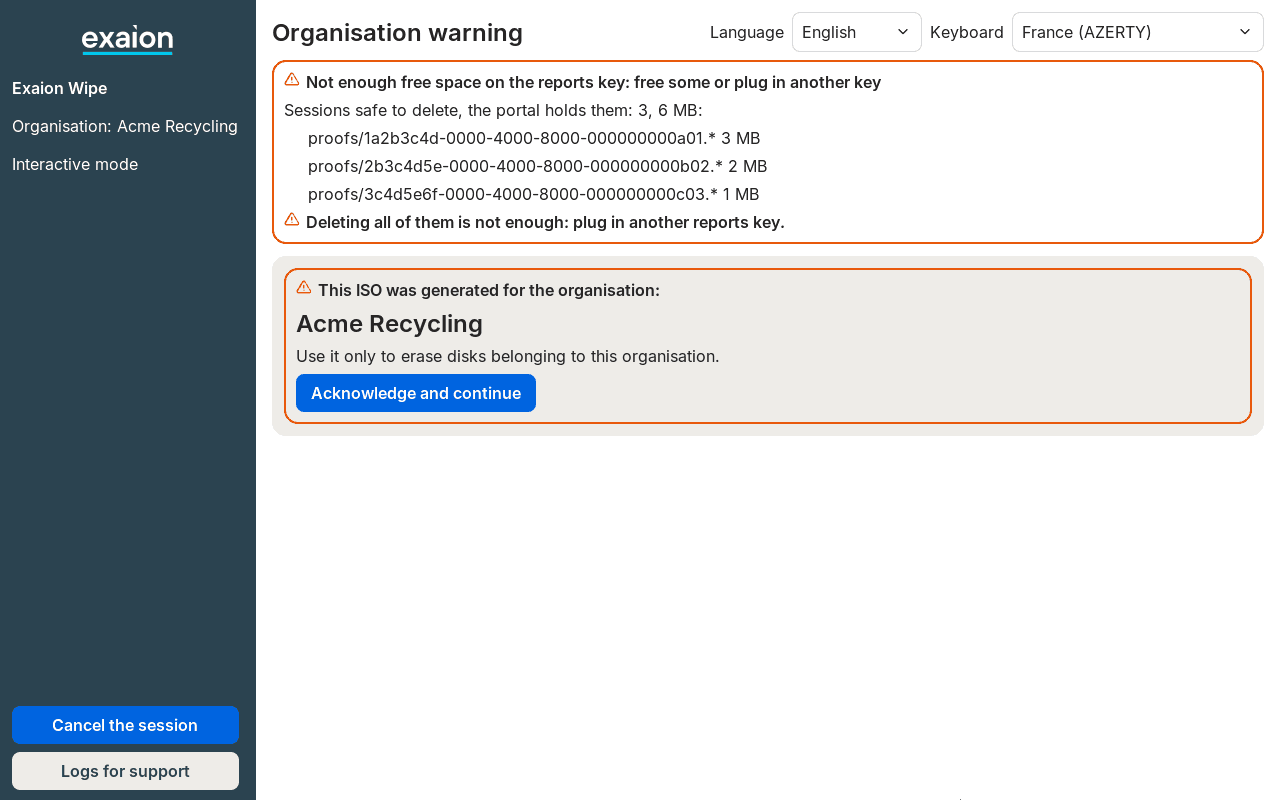
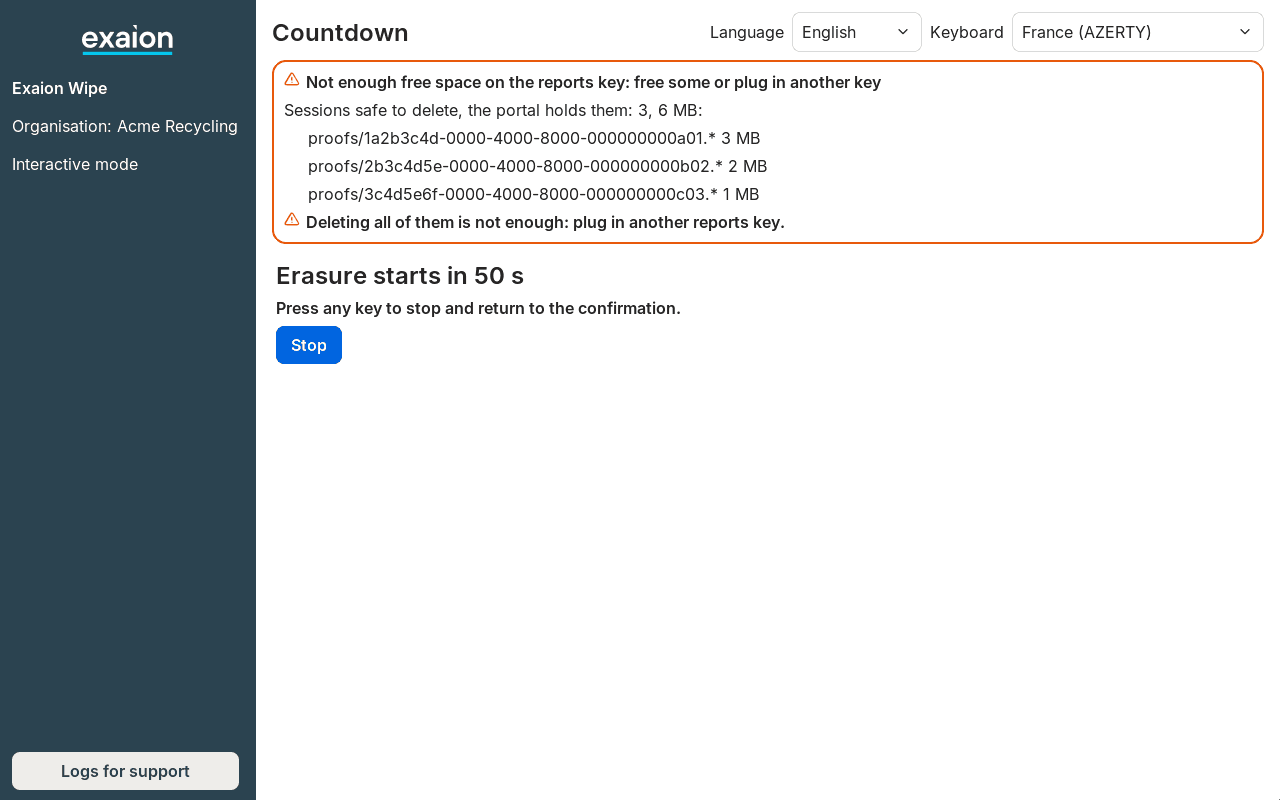
From the first screen to the confirmation, an orange box says
Not enough free space on the reports key: free some or plug in another key. It lists the
sessions you can safely delete, those the portal already holds. When deleting them would not
be enough, it adds Deleting all of them is not enough: plug in another reports key.
The confirmation's last lines say the same:
Not enough space on the reports key: the session will stop before erasing anything unless space is freed or another key is plugged in.
Stop there: cancel the session, free space or take another stick (see
When the stick is full), and start again.
If you go on, the countdown still runs and recalls the warning (on a console:
Reports key too full: free space or plug in another key, or nothing is erased.), then the agent
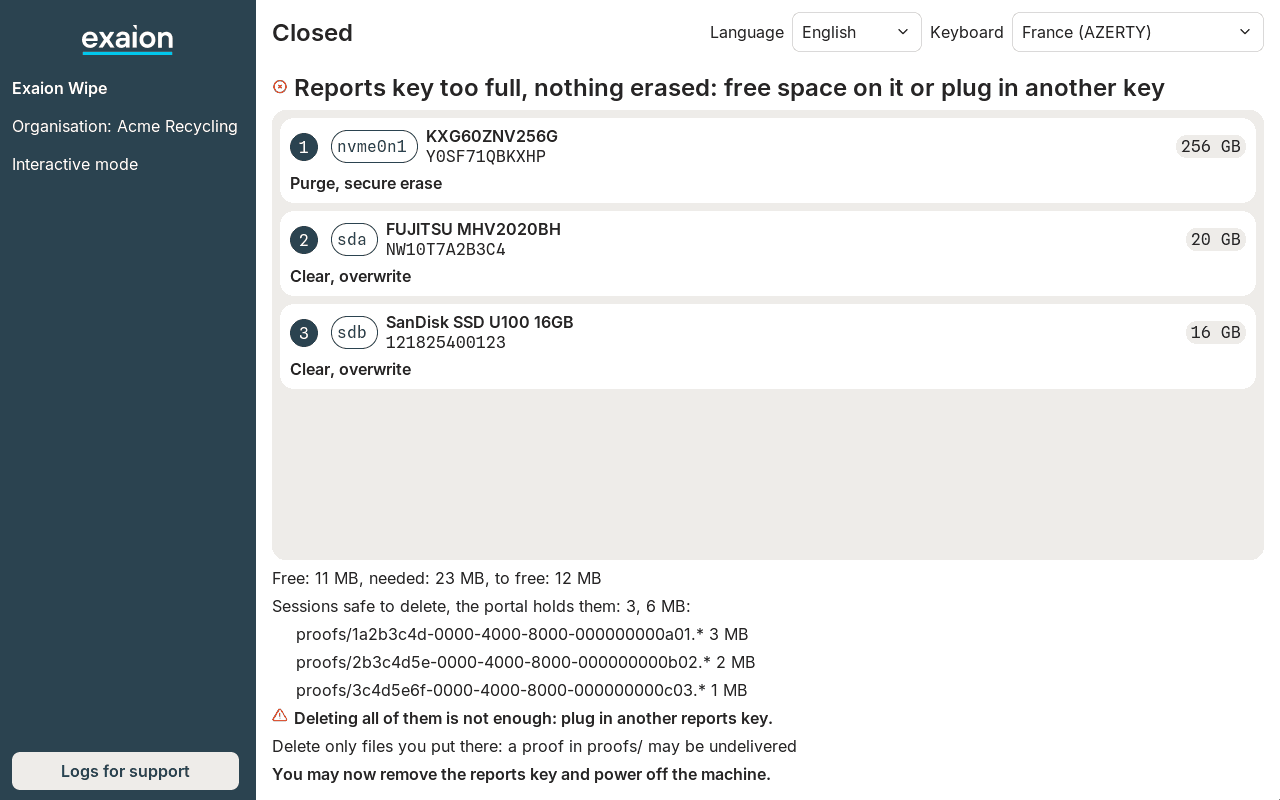
closes the session with
Reports key too full, nothing erased: free space on it or plug in another key, how much to free
and the sessions safe to delete. Nothing is erased.
A disk is refused at the confirmation
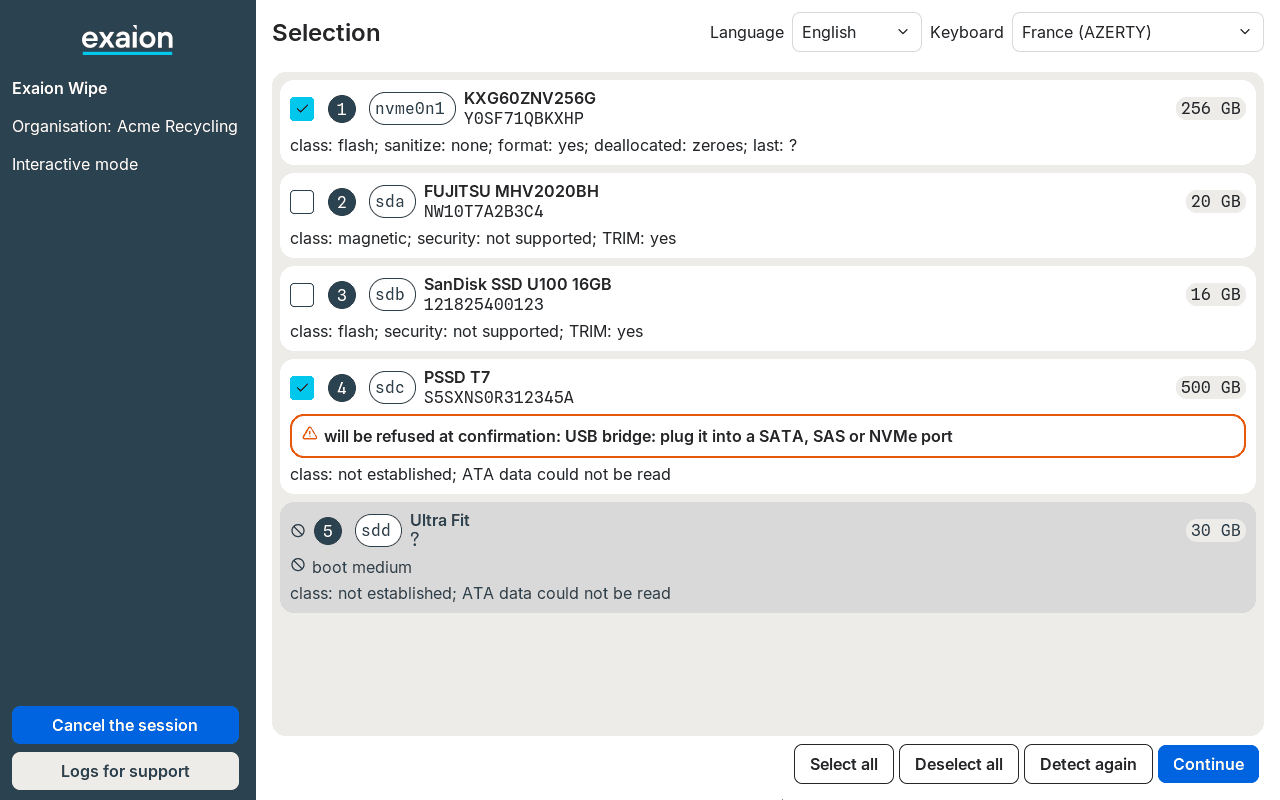
Some disks can be ticked but are refused at the confirmation, for example a disk behind a USB
adapter. The selection already warns under such a disk:
will be refused at confirmation: USB bridge: plug it into a SATA, SAS or NVMe port. The
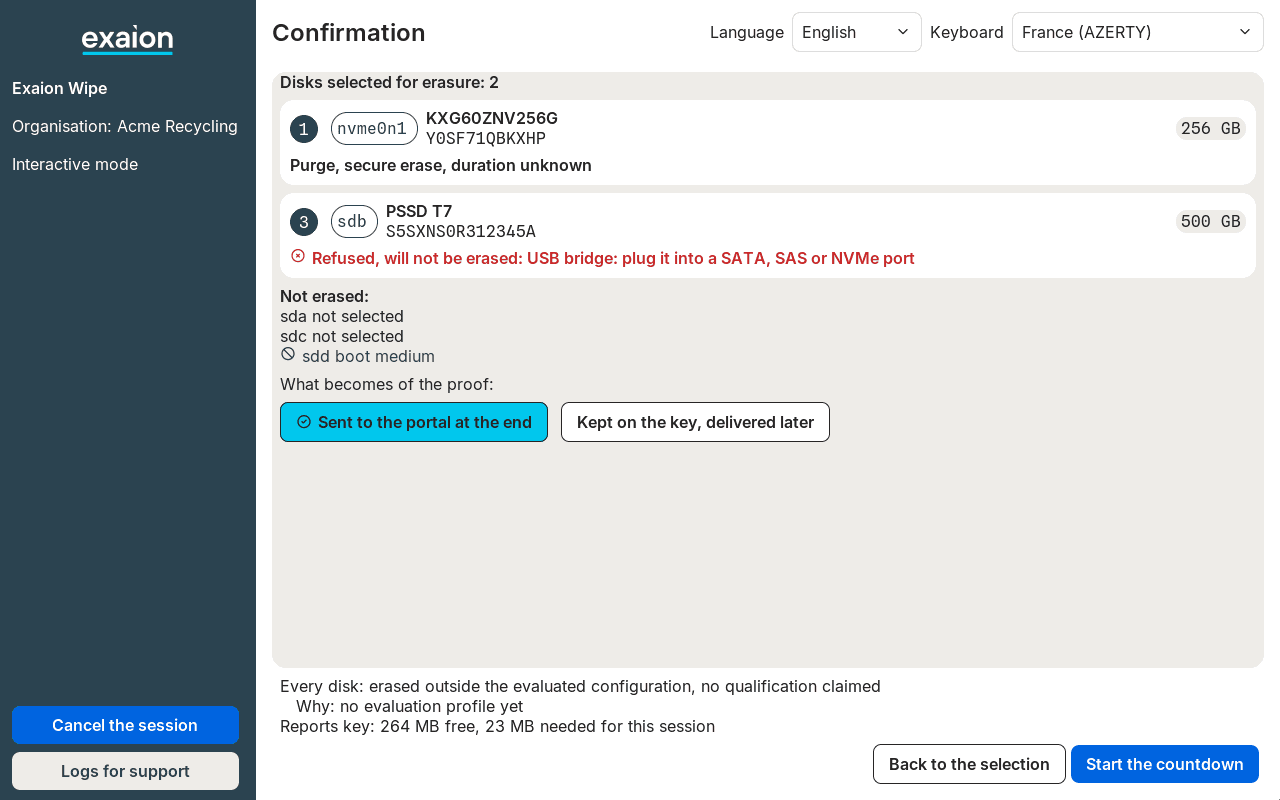
confirmation then shows
Refused, will not be erased: USB bridge: plug it into a SATA, SAS or NVMe port. The other disks
are erased as usual; the refused one ends skipped. Connect it as its line says, then erase it in
another session. See Disks refused at confirmation.
Cancel the session
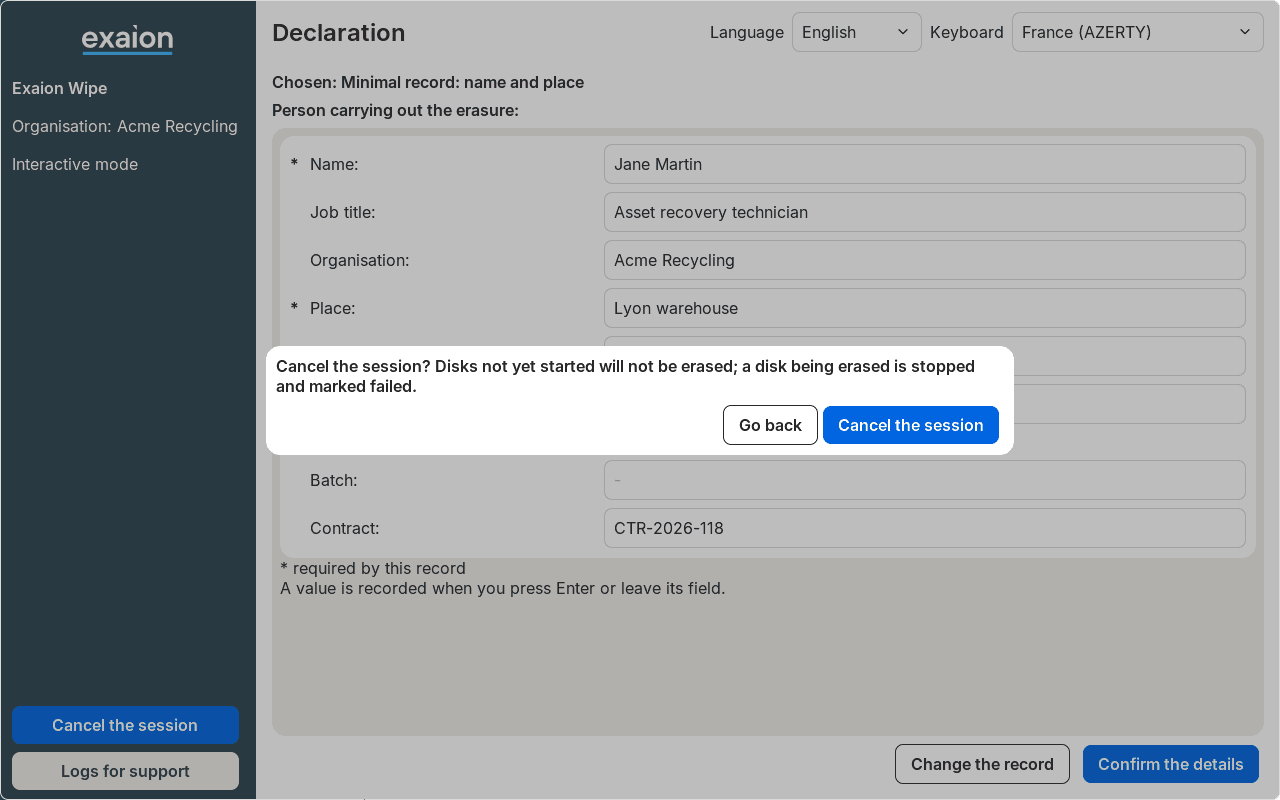
Click Cancel the session in the left column. The agent asks
Cancel the session? Disks not yet started will not be erased; a disk being erased is stopped and marked failed.:
click Cancel the session again, or Go back.
- Before the countdown, nothing is erased and the closing screen says
Session cancelled. It lists the disks with the method that was planned for each, and no result. - During the countdown, the button is hidden: press any key to go back to the confirmation, then cancel there.
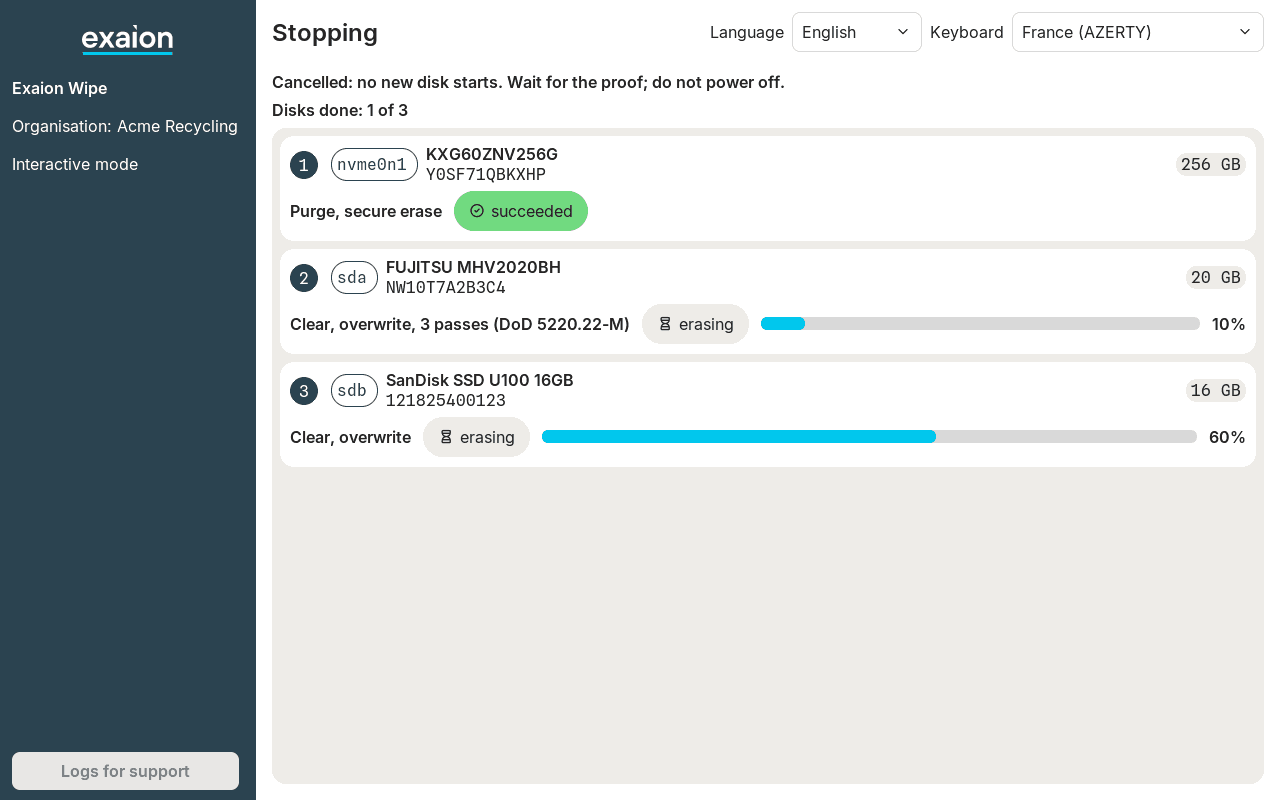
- During the erasure, no new disk starts and the others end
skipped. An overwrite still running stops, and its disk endsfailed: it is not fully erased. An erase run by the disk itself finishes. The title becomes Stopping:Cancelled: no new disk starts. Wait for the proof; do not power off.The agent then produces the proof of what was done, and the closing screen saysSession cancelled.
Technical details
Interact with the agent
How to answer the agent from its screen, with a mouse and keyboard, or from a serial console, how to change the language and keyboard, and how to write logs for support.
A non-interactive session
When to let the agent erase a machine without anyone at it, what to prepare, what the screens show, how to stop it and how to check the result.